Friday, December 31, 2010

Happy Birthday Sophia

  
Today is my niece's 3rd birthday. I wanted to make a very special card for her. I saw a card on Andrea Walford's  site and just had to make one of the little people I have seen popping up everywhere. Since I received the Ornament Punch for Christmas I just had to give one a try.  I do not have a lot of designer paper so I decided to use Love Letter Paper and color it with ink pads and sponges.  So here is my little Sophia with pearls on her hat, lots of pretty presents and plenty of sparkle.  

Wishing you all a Very Happy New Year!

Card Details:
Stamps:Tiny Tags
Paper: Early Espresso, Poppy Parade, So Saffron, Pretty in Pink, Baja Breeze, Love Letter DSP, Whisper White, Basic Black
Ink: Early Espresso, Poppy Parade, So Saffron, Blushing Bride, Baja Breeze 
Accessories: Big Shot, Northern Fury Impression Folder, Top Note Die, Corner Rounder Punch, Ornament Punch, Circle from the Itty Bitty Shapes Punch Pack, Smallest circle was made with the Crop-a-dile, Jewelry Tag Punch, Hair-Dotted Scallop Ribbon Punch, Hands-Boho Blossoms, 5/8" Whisper White Organza Ribbon, 1/8" Taffeta Ribbon-Marina Mist, Early Espresso, Basic Pearls, Vanilla Shimmer Smooch Spritz

Photobucket

Wednesday, December 29, 2010

Happy Birthday Dad!

My Dad's Birthday was a few weeks ago, but I have not had the time to post his card so here we go.  My Father has admired and collected Bald Eagles for many years.  So when this set came out I knew I had to get it for the simple reason to make him cards..  I found though that this set is great for any many cards I need to make.  For the background I used the Decorative Label punch and I cut it in half for the top, bottom and sides.


Card Details:
Stamps: In Wilderness, Teeny Tiny Wishes
Paper: Confetti White, Early Espresso
Ink: Early Espresso
Accessories: Square Lattice Textured Impressions Embossing Folder, Decorative Label Punch, Word Window Punch, Modern Label Punch, Metallic Brad


Photobucket

Saturday, December 25, 2010

Merry Christmas 2010

Merry Christmas!!! I have not had much time to stamp the last few months because I have been working on these Christmas cards.  My boys have instrument lessons and basketball practice so I sit in my truck on an average of 3 hours a day waiting for them.  I used a lot of that time for assembly.  I pray you all have a very Merry Christmas and that you celebrate the true meaning of Christmas. God Wants You to Know.  I wanted  a vintage look so I did quite a bit of sponging.  I think there was not one edge left unsponged.

Card Details:
Stamps: Come to Bethlehem, En Francais, Envelope-Artistic Etchings
Paper: Naturals Ivory, Cherry Cobbler, Crumb Cake
Ink: Crumb Cake, Cherry Cobbler
Accessories: Big Shot, Corner Rounder Punch, Vintage Wallpaper Textured Impressions Embossing Folder, Decorative Label Punch, Lots of Tags Sizzlit Die, Eyelet Border Punch, Crochet Victoria Trim Ribbon


Photobucket

Monday, November 08, 2010

Wolf Birthday

This is a card that was sent off to my son for his birthday.  Today, 25 years ago, I became a mother for the first time.  Now my son has his own house & family and I am so thankful for the man he has become.  Happy Birthday Heath! I did a very simple card for him...and no pearls :(  I cut the back panels, stamped them, sponged them and ran them through the Big Shot.  The Jumbo brad needed a back up to make it show better and the circle punch was the perfect size.  My other son said the sentiment looked like a bone and so it went very well together...;-)  To do the background behind the wolf I had read some where that the new clear blocks worked great for this and so I gave it a try.  The only problem I had with this is I did not want to get the clear block dirty.  It washed up just great so I survived. 

Card Details:
Stamps: In Wilderness, Teeny Tiny Wishes, Sanded Background
Paper: Early Espresso, Garden Green, Naturals White
Ink: Early Espresso, Pacific Point,
Accessories: Big Shot, Corner Rounder Punch, Square Lattice Impression Folder, 1" Circle Punch, Modern Label Punch, 5/8" Jumbo Brad, Punch Windows Die

Photobucket

Friday, November 05, 2010

Pacific Thank you

 I just love browns and blues together and thought his was a great color combo taken from the designer paper. Can you tell that I love it, I just cannot get away from it.  I know I saw this sketch on a blog somewhere and I am sorry if the credit is to go to someone specific.  It is an easy one that I know I will be using again sometime. This was a very simple stamp, layer, no sponging (wow!), punch, impress card.


Card Details:
Stamps: Funky Four, Tiny Tags
Paper: Pacific Point, Crumb Cake, Blueberry Crisp DSP, Very Vanilla, Not Quite Navy
Ink: Pacific Point, Soft Suede, Not Quite Navy
Accessories: Big Shot, Corner Rounder Punch, Perfect Details Texturz Plate, Victoria Crochet Trim Ribbon, Jewelry Tag Punch


Photobucket

Wednesday, November 03, 2010

Favorite Mushrooms

This was a set that was at the top of my want list when the catalog came out.  I thought these little mushrooms were the cutest.  I stamped them twice, once in Soft Suede and once in Pacific Point.  I then cut out some of the elements in Soft Suede and mounted them on top on the Pacific Point ones.  The pearls between the mushrooms...were meant to be.  (I smudged a finger print and had to cover it up....)  If you can see I added a few pearls inside the background impression too.  The sentiment design just came together too.   I love the way it turned out so fun!  This poor image was stamped and matted weeks ago and tried on various cards and I just could not get it to fit, so it just went back on the shelf to wait...until I finally came up with a home I think it is very happy on.

Card Details:
Stamps: Funky Four, Teeny Tiny Wishes
Paper: Pacific Point, Soft Suede, Very Vanilla
Ink: Soft Suede, Pacific Point
Accessories:  Big Shot, Elegant Lines Impression Folder, Pearls, Victoria Crochet Trim Ribbon, Dotted Scallop Ribbon Border Punch, Small Oval Punch, Large Oval Punch, 3/4" Circle Punch


Photobucket

Friday, October 29, 2010

Get Well

This was the first card that I was happy about in a very long time.  I think I had lost my creative mojo with all that has been going on.  I am still on some pretty strong pain meds while I am typing this post ( I made the card awhile back and had my son take the picture this morning) so if I make any errors I can blame them on that ;-).  As I sit here in my recliner looking across my bedroom at my work area (I cannot wait to get enough energy to get over there!) I see a pattern.  I have used the same color scheme in all of the cards that I have made the 2 weeks I had between my surgeries.  I love the Blueberry Crisp DSP and the colors that it comes in are great!

For the background on the Top Note Die I cut the paper in strips and glued them on a piece of scrap paper. I then ran it through the Big Shot and trimmed off the outer edge.  I then mounted it on the Crumb Cake and ran it through the Big Shot again with the Vintage Wallpaper Impression folder. I sponged Crumb cake across the top. The Pacific Point card base was stamped in Crumb Cake with the Sanded Background.  I sponged the edges of everything with Crumb Cake.  I am also addicted to the pearls and someone has to stop me from adding them to every card I make :).

Card Details:
Stamps: Aviary, Teeny Tiny Wishes, Sanded Background
Paper: Pacific Point, Crumb Cake, Blueberry Crisp DSP, Very Vanilla
Ink: Early Espresso, Pacific Point,
Accessories: Big Shot, Top Note Die, Corner Rounder Punch, Vintage Wallpaper Impression Folder, Victoria Crochet Trim Ribbon, Wide Oval Punch, Decorative Label Punch, Word Window Punch, Modern Label Punch, Basic Pearls


Photobucket

Thursday, October 14, 2010

Aviary Thank you

So I figured that I would try to get a card made before my surgery. I got one done and some parts for another couple started that I hope to get together and finished yet this week.  I love this set in the catalog but it has so many options that I want to do that I just could not figure out where to start.  So I kept it pretty simple.  I stamped the cage leg and used dimensionals to pop up the cut out cage.  I love, love, love the new decorative label punch from the mini and I know I will get my money's worth out of it.  I am going to need quite a few thank you cards in the next month.  I sponged across the card from with a bit Early Espresso Ink.

Card Details:
Stamps: Aviary, Because I Care (Hostess level 1)
Paper: Marina Mist, Early Espresso, Very Vanilla
Ink: Early Espresso, Marina Mist
Accessories:  Decorative Label Punch, Early Espresso Ribbon, Big Shot, Finial Press Impression Folder, Scallop Trim Border Punch, 1/8"  Early Espresso Taffeta Ribbon


Photobucket

Friday, October 08, 2010

Balloon Owls


My daughter has a birthday party to go to tomorrow so I had to get a card made.  This one took me most of the week because my spare time is so sparse right now. When I saw this one on Splitcoast I know it was the one I wanted to do.  She asked if I could add a few balloons so that is just what I did ;)  I tore a piece of scratch paper and used my Whisper White Craft ink to create the clouds in the background.

The balloons are made with the 3/4" circle punch and a trimmed corner.  The hats I just free hand cut and she wanted some rhinestones added because all 9 yr old gilrs need lots of bling.

I chose not to cut the card but to just add legs for the pop up.  The hardest part was tying all of the thread to the balloons.


Stamps: Tiny Tags, Woodgrain Background, Heard from the Heart, Teeny Tiny Wishes
Paper: Marina Mist, Old Olive, Chocolate Chip, Crumb Cake, Cherry Cobbler, Not Quite Navy, Pear Pizazz, Cajun Craze, Whisper White, Basic Black
Ink: Early Espresso, Old Olive, Cherry Cobbler, Not Quite Navy, Lots of sponging with the matching colors
Accessories:  3/4" Circle Punch, Owl Punch, Bird Punch-Leaves, Wide Oval Punch, Jewelry Tag Punch


I am headed in for my first surgery on Monday so it may be a while before I can post again (unless I steal some time this weekend :)   )  Enjoy the beautiful fall weather and colors!

Photobucket

Wednesday, September 29, 2010

Fall Leaves


Well, I worked around the upload problem....guess I will have to find time to figure that out. I just had to take time today to stamp, it has bee way toooo long!  My 1st of 3 surgeries is scheduled in less than 2 weeks and I am trying so hard to get everything in my house ready for my re-cooping not to mention home-schooling and running the kids to all of their events.

  After not stamping for a long time I really struggled with this card and almost gave up a few times.  I got a new order from the Holiday mini earlier this week and it has been just wanting to be played with.  I had 3 different images on the front before I finally had something I would even post.  Good news is I now have 2 other images to use on a card in the near future. I had the idea to elongate the new Decorative label punch so I had it all cut and put together and just had to have an image that fit in that space.  Because I made such a busy background I wanted to keep everything else pretty simple.  I did not think the silver clip worked as well with fall colors, and I am just a gold girl...don't own much silver besides my SU! jewelry.  So I heated up the clip and dipped in in the gold embossing powder.It is looped through the ribbon and held in place with the glue dots.  I love the new Letter Press Plates!!!  I still need a bit of practice but they are so fun and add just the right dimension.

I love the cracked Glass technique with the fall leaves.  It is so easy to do and just takes a few layers of Clear Embossing powder and a freezer.

I better get back to work.  Hope to see you all again soon!!

Card Details:

Stamps: French Foliage, Sanded Background, Tiny Tags
Paper: Early Espresso, Very Vanilla
Ink: Early Espresso, More Mustard, Cajun Craze, Versa Mark
Accessories: Crystal Clear Embossing Powder, Gold Embossing Powder, 1/2" Circle Punch, 3/4" Circle Punch, Victoria Ribbon, Early Espresso Taffeta Ribbon, Clip Assortment, Basic Pearls, Northern Trim Letterpress Plate, Decorative Label Punch, Big Shot, Piercing Tool and Mat Pack
Techniques: Cracked Glass


Photobucket

Wednesday, September 15, 2010

Retired Store

If you are looking for any retired Stampin' Up! merchandise don't forget to check out my Retired Page. I have 100's of things on sale and ready to find a new home.
Photobucket

Monday, August 30, 2010

Please Bear with me

Please bear with me. For some reason I am unable to upload any images through blogger right now. I have tried many times on many computers with no success. My schedule is over flowing with Doctor appointments for myself (sinus surgery scheduled for October) and my son and with school starting my time to look into this issue is not very free.  So I hope to be back and posting with images very soon!
Photobucket

Monday, August 23, 2010

MDS Monday-New Blog in German

Well, besides being gone for a week running Vacation Bible School at my Father's church I have been busy working on a new blog for another Stampin' Up! demonstrator.  It was not a hard design the hard part was that it had to be done in German. I did take a couple of years of German in school but that was too many years ago to admit.  She tried her hardest to portray in English what she wanted and I tried my best to understand her German.  I remembered I had a site bookmarked that I had used for some Spanish a few years back so I am so thankful that it helped refresh my German too.  (www.freetranslation.com).  She is still in the transfer stages from Wordpress but you can check out Rosie's MDS blog here.  If you have any questions about MDS or MDS Blogs please post them in the comment section.

Photobucket

Friday, August 20, 2010

Another Graduation...

I think this is the last of the 8th grade graduation cards that I had to make. I sat down one day and pretty much did nothing but make cards now I have to go back and figure out which ones I did and did not post yet. To get the single image all I did was to put a piece of tape on the image on each side of the stamp then I stamped in the VersaMark and embossed with Black embossing powder.  To do the banner I stamped my image and cut the v's in each end.  I used 3 glue dots, one on each and and one in the middle to get it to do the wave.  I guess I am in a monochromatic mode.  I love see what the "partners" to all the new colors look like.

Card Details:
Stamps: Sanded Background, Go Graduate
Paper: Baja Breeze, Not Quite Navy
Ink: Not Quite Navy, VersaMark
Accessories: Big Shot,  Embossing Powder,  Vintage Wallpaper Impression Folder, Spiral Border Punch, Ticket Corner Punch, 1" Circle Punch, 1-1/4" Circle Punch


Photobucket

Friday, August 13, 2010

Punchy Chirpie

I was in the need for a card for a pre-teen girl and when I saw this card on Chanda's Blog I knew this was a perfect one for her. It was such a fun punch card.  Of course I had to add my own little touch and add texture to the chest and wings.  My eyes did not turn out as nice.  I guess I will need to get those little punches after all. :)
Card Details:

Stamps: Woodgrain Background
Paper: Pacific Point, Bashful Blue, Old Olive, Basic Black, Whisper White, Chocolate Chip
Ink:Chocolate Chip, Sponging-Chocolate Chip, Pacific Point, Old Olive
Accessories: Whisper White Watercolor Crayon, Scallop Circle Punch, Boho Blossom Punch, Small Heart Punch, Various Circle Punches (sorry I do not recall since I made this over a month ago to mail out right away.), Wide Oval Punch, Two-Step Bird Punch, Big Shot, Little Leaves Die

Photobucket

Wednesday, August 11, 2010

Lattice Birthday

Wow, this was one I did a while back and it must of been missed.  I loved the Lattice Impression folder when I first saw it, ok I love all of the Impression Folders.  Since it was on back order for soooo long I got to see many cards done with it with I was (not so) patiently waiting.  I saw quite a few that i liked when they impressed the whole card, even the image.  That is the look I was going for here.  I needed a card for a teen boy so I could not use flowers or pretty things :(  

Card Details:
Stamps: Perfect Punches, Birthday Bliss
Paper:Marina Mist, Early Espresso, So Saffron
Ink: Early Espresso
Accessories: Big Shot, Wide Oval Punch, Lattice Impression Folder, Large tag Punch, Small Tag Punch,  Lots of Tags Die

Photobucket

Monday, August 09, 2010

MDS Monday More pages...

You would surprised what you can find on Google.  In my research I was able to find the name of the fleet that my ancestors came to America on.  So I Googled it and  found a sketch of what the ship looked like.  I just had to include that in my book.  My children found it fascinating.  One thing I love about digital scrap booking is that I can add buttons and I get the button look without the bulkiness.  I am having so much fun doing this book and I hope you are enjoying seeing how it is coming together.

My Digital Studio Page Details:
Stamps: Extreme ElementsPaper: 
Chocolate Chip Script DSP
Ink: Chocolate Chip
Accessories:  Chocolate Chip Satin Ribbon, Square Punch


Photobucket

Friday, August 06, 2010

VW Slug Bug Card


I needed a card for one of my son's friends for his birthday. They are taking driver's training and they also love to play the "slug bug" game. So when I saw this card I knew it was the one that I had to do for his birthday.  I did not have any tree stamps that would go with a cartoony car and I had no designer paper either so I turned to MDS to get the paper I needed and just printed it off.  I thought it was great to do a punch car card with all kinds of punches.  The headlights I had to hand cut since I did not have a punch that size.

Card Details:
Stamps: Birthday Bliss
Paper: Chocolate Chip, Real Red, Brushed Silver, Old Olive, Basic Black, Whisper White, So Saffron,  MDS-My Sweet Pea Pattern 37 DSP 
Ink: So Saffron, Chocolate Chip
Accessories: Big Shot, Wide Oval Punch, Large Oval Punch, Word Window Punch, Modern Label Punch, 1/2" Circle Punch, Retired Horizontal Slot Punch, Scallop Oval Punch, Lots of Tags Die, Curves Ahead Die


Photobucket

Wednesday, August 04, 2010

Birthday Bag


I usually do not use my hostess sets that I earn but this one is just what I needed.  I needed a quick easy birthday card so I jumped on over to the Sketch challenge.  Even though it was not an easy sketch I just could not turn away the challenge.  So off I went to try and figure out how I wanted this to go.  after I had chosen my colors I knew I wanted to use my new Concord Crush ribbon so I thought to bring it all together I should do my layering in Whisper White. I offset the layers and pushed it all to one side.  The card base is slightly smaller than a regular card to compensate for the hanger over.  That way it will still fit in an envelope.  I colored the image with the markers (which I am not very good at) So this card and gift are ready to go out the door with me.


Card Details:
Stamps: Perfect Punches, Birthday Bakery
Paper: Early Espresso, Whisper White, Concord Crush
Ink: Early Espresso, Daffodil Delight, Concord Crush
Accessories: Concord Crush Ribbon, Big Shot, Vintage Wallpaper Impression Folder, Designer Lable Punch


Photobucket

Monday, August 02, 2010

Monday MDS Genealogy Book


So it is Monday again and another day to share with you one of my pages from the Geneology book I am re-doing in MDS.  If you click on it it will enlarge in another window/tab.  So on the first page you will see the grids that I created in Microsoft Publisher to follow my family tree.  On the grid I have put the name of the parents, birth date, death date and marriage dates.  I have listed their children and their dates below that.  I highlighted the name that would bring me further down my tree and the next grid would start with the highlighted name and their spouse. In order for me to use this grid I converted it from a document to a jpg and brought it in as a picture.  To cover the areas that were blank on the grid I used the square punch and covered the area I wanted to blend in.  I then filled it with the same paper I used for my background picture.    The picture at the bottom is a picture I found on-line of the church my ancestor was married in in England.  The second page is full of information I found about this person and his journey to America.  If you have any questions or if would would like more explained directions please leave a comment with your question.

My Digital Studio Page Details:
Stamps: Extreme Elements
Paper: 
Certainly Celery Script DSP
Ink: Certainly Celery
Accessories:  Old Olive Satin Ribbon, Square Punch
Photobucket

Friday, July 30, 2010

Happy Birthday Katie

I cannot believe my grand-daughter will turn one year old tomorrow.  I just had to make her a very very special card to celebrate.  I found this card at Jackie Topa's Blog (she is amazing!)

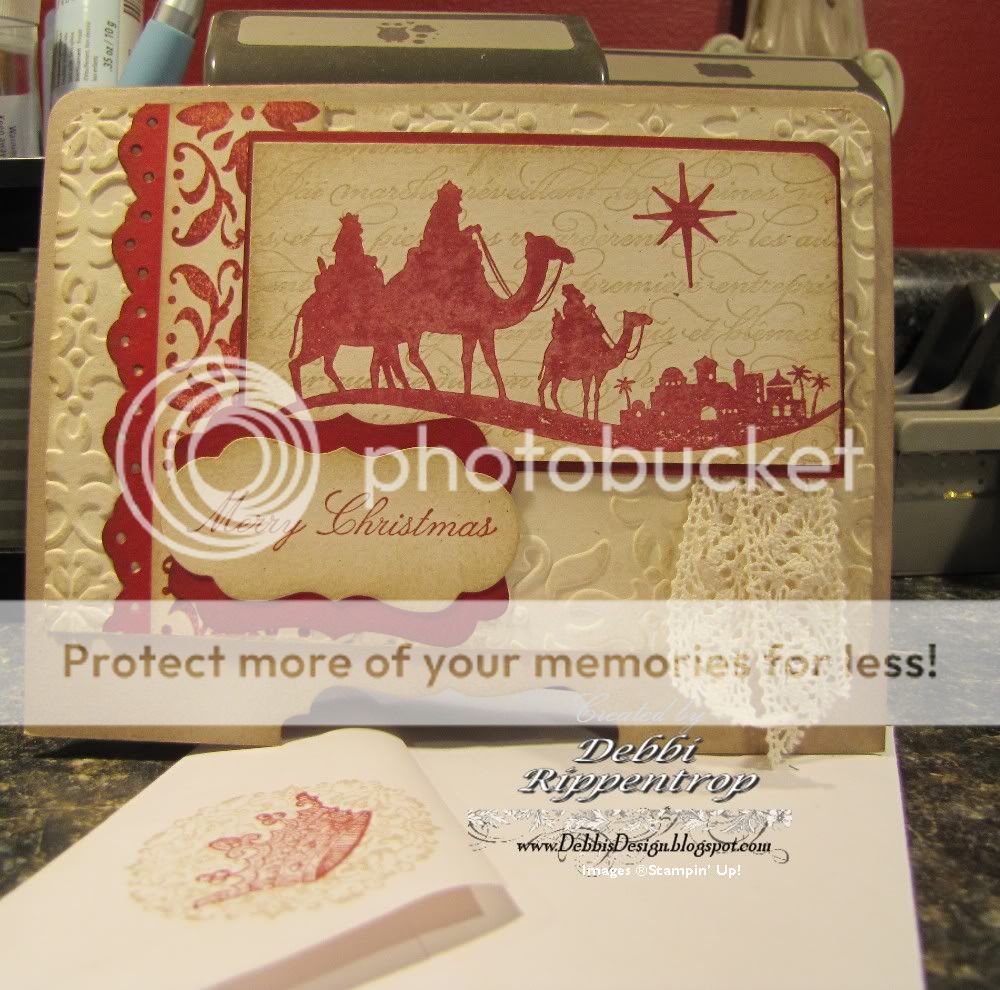
For the front I decided I wanted to go with a vintage look since I had done so much sponging on the inside.  I ran my inked brayer over the impression folder and then ran it all through the Big Shot.  I then, of course, sponged around all of the edges. My 8 yr old daughter wanted me to add lots of pearls but I decided to use just one to dot the i in Birthday.  I colored the sentiment stamp with the markers before stamping on the card stock.

So this card actually fold pretty flat.  I have sent cards out for Christmas that did not need extra postage so I ma not so sure this one would have.  Of course it went in a box via UPS filled with lots of birthday goodies.

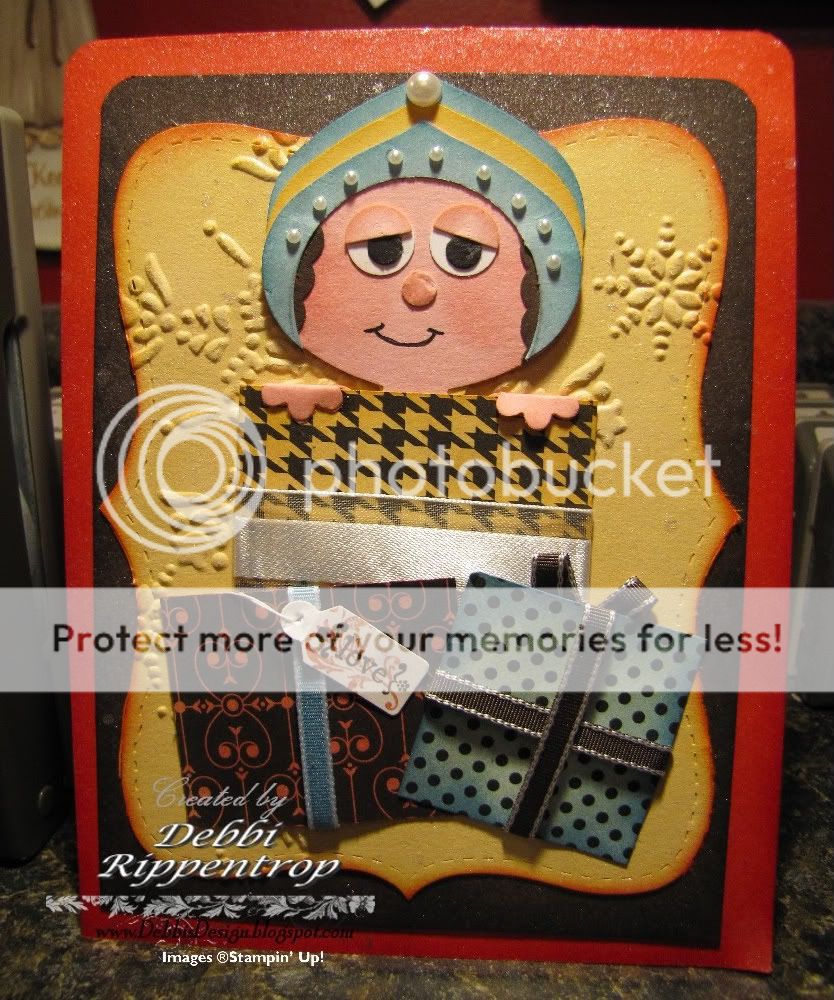
The Amoire was so fun to do since a great Aunt had given her one not too long ago as a gift.

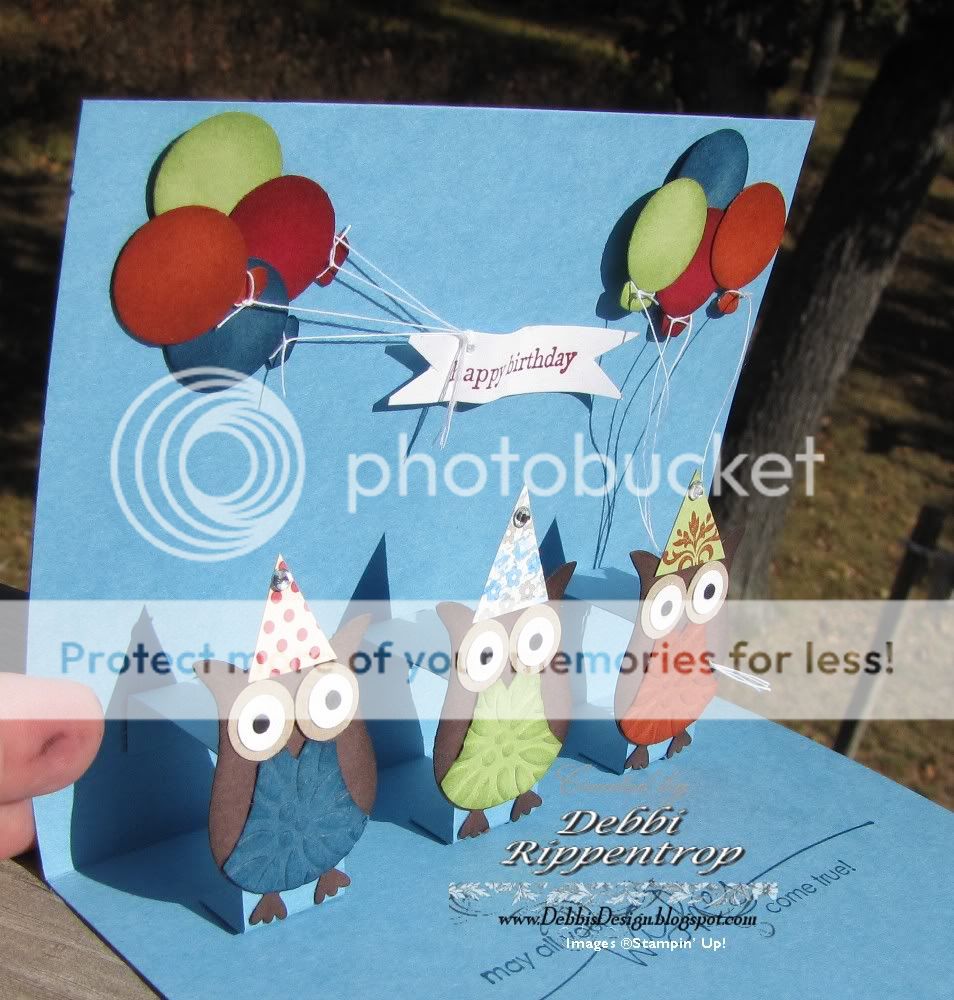
I did not do a side step like Jackie had in her original card since I wanted it all to fold up.  So with mine the base folds up to put away and pops down to stay open.  I used the half pearls as knobs.

Ok, do not do this card when you are in a hurry or when your kids decide it is "question day"  I had both bears all done and then I realized that I had not done one in mirror image....duh!  so thankfully card stock has two sides and I just flipped it all around.  I did not have the die that she used for her oval scalloped mirror so I used my large scallop circle and my circle scissor to make my mirror.

Well, I hope she enjoys the bears that Grandma made her for her birthday and another great big thank you to Jackie for all of the wonderful inspiration on her blog!

Card Details:

Stamps: Perfect Punches, WoodGrain Background, Whimsical Words (2010 SAB set), Tiny Tags
Paper:Chocolate Chip, Blushing Bride, Crumb Cake, Basic Black, Riding Hood Red, Blueberry Crisp DSP, Window Sheet, Very Vanilla
Ink: Marina Mist, Chocolate Chip
Accessories: Big Shot, Wide Oval Punch, Vintage Wallpaper Impression Folder, Pretty in Pink Grosgrain Ribbon, Marina Mist Grosgrain Ribbon, Victoria Crochet Trim, Basic Pearls, 2 Step Owl Punch-heart, Curly Label Punch, Scallop Circle #2 Die, Circle Scissor, Bear Bigz Die, Beary Essentials Bigz Die, Small Heart Punch, Dotted Scallop Ribbon Border Punch


Photobucket
Related Posts with Thumbnails