Showing posts with label Big Shot. Show all posts

Tuesday, August 16, 2011

Need for Thank You-s


Our theme this year for Bible School was Rev it Up!  So I was very pleased when I saw the Need for Speed set in the new catalog.  I needed to make a bunch of Thank you cards for all of the volunteers so I put my kids to work punching and sponging. My 11 yr old son even cut out all of the cars for me after I stamped them.  What great helpers I have and I think the cards turned out great and were appreciated!

Card Details:
Stamps: Need for Speed, Tiny Tags
Paper: Pool Party, Island Indigo, Whisper White, Early Espresso
Ink: Early Espresso, Sponge-Pool Party, Island Indigo
Accessories:  Big Shot, Impression Embossing Folders: Stripes, Square Lattice, Perfect Polka Dots, Tasteful Trim Die, Petite Pennants Builder Punch, Extra Large Oval Punch, 3/4" Circle Punch, 1/2" Circle Punch


Photobucket

Friday, August 12, 2011

Relax

I have a very dear friend who had a heart scare and is one of those people who just goes, and goes, and goes no matter what.  So I wanted to make him a special card.  Of course I had planned on using one of my new sets, but I could not think of a design I wanted so I hit the gallery at Splitcoaststampers. I found a card by the wonderful Michelle Zindorf and it took off from there.  I cannot for the life of me use my brayer to get anything to look like hers so I used my sponges (and it still looks no where near as beautiful as hers) but I am happy enough to send it out.

Card Details:
Stamps: Sweets for Sweets
Paper: Poppy Parade, Not Quiet Navy, Whisper White
Ink: Poppy Parade, Crumb Cake, Night of Navy, Soft Suede
Accessories: Big Shot, Framed Tulip Impressions Folder, Naturally Serif Alphabet Die, Island Indigo 3/8" Ruffled Ribbon


Photobucket

Tuesday, August 02, 2011

Poppy Blossoms


I sooo wish I had more time for designing and creating.  I fell in love with these colors when I saw them setting out on my desk and it took me almost 2 weeks to get time to make something with them.  I have loved the flowers I have sen made with the Blossom Bouquet Triple Layer Punch that I just had to make some myself.  The punch is so easy to use and has such a wide variety.  I cannot wait until life slows down a bunch, I have some great ideas I want to try.  Of course all of the edges are sponged to add more dimension and the flowers are popped up with Dimensionals.

Card Details:
Stamps: Perfect Punches
Paper: Poppy Parade, Calypso Coral, Chocolate Chip, Crumb Cake, Pear Pizzazz
Ink: Chocolate Chip- Sponging:Poppy Parade, Calypso Coral, Chocolate Chip, Crumb Cake, Pear Pizzazz
Accessories: Big Shot, Framed Tulip Impressions Folder, Finial Press Impression Folder, Blossom Bouquet Triple Layer Punch, Itty Bitty Shapes Punch Pack, Basic Pearls, Curly Label Punch, Leaves-Bird Builder


Photobucket

Monday, April 04, 2011

Beary Balloons Birthday

My daughter wanted a cute girly card to go with her gift for her birthday party last week so this is what I came up with.  The girl's mother told me that her daughter loves purple.  The bear and balloons are popped up with dimensionals and the banner and butterfly was curled and adhered with Mono adhesive.  I wanted the background to look sky like so I tore a sheet of paper and did a bunch of edge sponging.
Card Details:
Stamps: Teeny Tiny Wishes, Vintage Vogue
Paper: Concord Crush, Sahara Sand, Daffodil Delight, Pear Pizazz, Peach Parfait, Poppy Parade, Chocolate Chip, Basic Black, Riding Hood Red
Ink: Concord Crush, Sponging-Sahara Sand, Daffodil Delight, Pear Pizazz, Peach Parfait, Poppy Parade, Chocolate Chip
Accessories: Big Shot, Circle Punch, Perfect Polka Dots Impression Folder, Beautiful Wings Die, Top Note Die, Build a Bear Die, Build a Bear Essentials Die,  Pearls, Concord Crush Stitched Poly Ribbon, Filigree Designer Brads

Photobucket

Friday, April 01, 2011

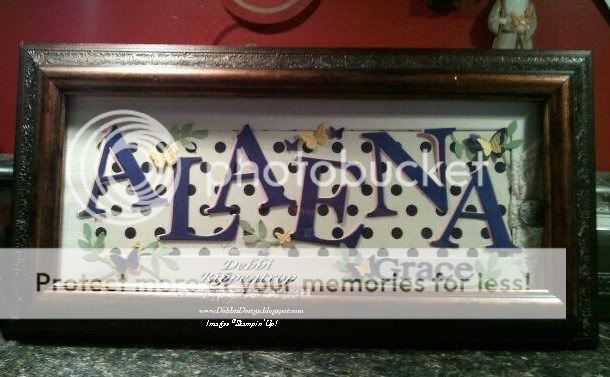
Alaena Plaque

My daughter needed a gift for a friend and after the last baby frame that I did she requested I make one for her friend since her name is spelled uniquely and personalized things would be hard to find.  

Card Details:
Stamps: None
Paper: Vanilla, Love Letter DSP, Blushing Bride, Concord Crush, Pear Pizazz, Daffodil Delight
Ink: None
Accessories: Big Shot,  Serif Essentials Alphabet (large), Naturally Serif Alphabet Die (small), Beautiful Wings Die, Tow Step Bird Punch, Victoria Crochet Trim Ribbon, Antique Brad

Photobucket

Wednesday, March 30, 2011

Sympathy Butterfly


Hubby called again today and needed a sympathy card for someone at work.  It once again had to be a full size card for many signatures.  So this card is 8.5" x 5.5".  It went together very simple and quick.  This Love Letter Designer paper is becoming my "go to" paper and I will have to stock up if it is dis-continued at the end of the catalog.  The butterfly was sponged with Very Vanilla Craft ink to soften the edges just a bit.  The Sympathy is pop up with many dimensionals and the butterfly is stuck on with Mono Adhesive.


Card Details:
Stamps: Thanks for Caring
Paper: Naturals Ivory, Basic Black, Love Letter DSP, Riding Hood Red
Ink: Early Espresso, Sponging-Sahara Sand, Very Vanilla Craft
Accessories: Big Shot, 2 1/2" Circle Punch, Scallop Circle Die #2, Pearls, Beautiful Wings Die, Scallop trim Border Punch, Victoria Crochet Ribbon

Photobucket

Monday, March 28, 2011

Spinner Happy Birthday

I really needed a manly happy Birthday card for my Father-in-Law last week.  I did not have a clue where to start.  Before I ran my kids to band I set out all of the colors I wanted to use and in the order I wanted them placed.  I took a picture of the pile with my cell phone and took it with me.  twice a week I sit for 2 hours while my boys take turn having band lessons.  The downfall of not living in town where they could walk.  So I studied the picture and the layout from the sketch challenge while I was waiting.  So after I got home and fed the kids lunch I was ready to make it all fall in place. I loved the spinner cards and just had to have them but the right opportunity just did not come up until now.  I did not have any black brads so I had to make them but heating the up with the heat gun, dipping them in the black embossing powder and heating again if needed.  I love that sponging ink around the edges of the Love Letter paper does so much but yet so little.  I had it all lined up straight and was ready to adhere and I decided to shift it all just a bit.  I am glad that I did.

Card Details:
Stamps: Take a Spin, Sanded Background
Paper: Cajun Craze, Old Olive, Basic Black, Very Vanilla, Love Letter DSP
Ink: Cajun Craze, Old Olive
Accessories: Big Shot, Circle Punch, Old Olive Brads, Black Embossing Powder, Corner Rounder, Lattice Impression Folder 

Photobucket

Friday, March 25, 2011

Baby Boy Name Plaque


I had to get together a baby shower gift so this weeks posts will contain the card, bag and gift that I made this last weekend. I wanted them all to co-ordinate so I tried to keep the circle theme and colors through out.

 I found the easiest way to make the circles is to punch the small one first and work my way out. Since for the 3 projects I was working on I started with the 3/8" circle punch and worked my way out to the 1-3/4" circle punch.  That way I had various sizes to work with and used as little card stock as possible.


Card Details:
Stamps: None
Paper: Marina Mist, Not Quite Navy, Blueberry Crisp Designer Paper
Ink: None
Accessories: Big Shot, Circle Punches,  Serif Essentials Alphabet (large), Naturally Serif Alphabet Die (small),, 1/8" Marina Mist Taffeta Ribbon, Frame


Photobucket

Wednesday, March 23, 2011

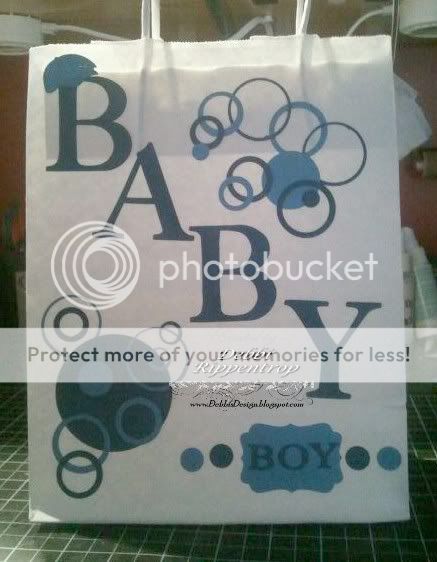
Baby Boy Bag

I had to get together a baby shower gift so this weeks posts will contain the card, bag and gift that I made this last weekend. I wanted them all to co-ordinate so I tried to keep the circle theme and colors through out.

 I found the easiest way to make the circles is to punch the small one first and work my way out. Since for the 3 projects I was working on I started with the 3/8" circle punch and worked my way out to the 1-3/4" circle punch.  That way I had various sizes to work with and used as little card stock as possible.

This is just a plain white gift bag.  I stocked up on them when SU discontinued them a few years ago.  I added the circles as I had explained above and glued them all on with the Mono Adhesive glue.


Card Details:
Stamps: None
Paper: Marina Mist, Not Quite Navy, 
Ink: None
Accessories: Big Shot, Circle Punches, Decorative Label Punch, Serif Essentials Alphabet (large), Naturally Serif Alphabet Die (small), Cap-Beary Boy Die 

Photobucket

Monday, March 21, 2011

Baby Boy Card

I had to get together a baby shower gift so this weeks posts will contain the card, bag and gift that I made this last weekend.  I wanted them all to co-ordinate so I tried to keep the circle theme and colors through out.

I have always thought the punch art sail boats are so cute and so simple. I used Dimensionals to pop up the pieces of the sailboat. So I decided to use that as my focus on the card.  I found the easiest way to make the circles is to punch the small one first and work my way out. Since for the 3 projects I was working on I started with the 3/8" circle punch and worked my way out to the 1-3/4" circle punch.  That way I had various sizes to work with and used as little card stock as possible.


Card Details:
Stamps: None
Paper: Marina Mist, Not Quite Navy, Whisper White Blueberry Crisp Designer Paper 
Ink: None
Accessories: Big Shot, Perfect Polka Dots Embossing Folder, Square Lattice Embossing Folder, Framed Tulips Embossing Folder, 1/8" Marina Mist Taffeta Ribbon, Naturally Serif Alphabet Die, Star-Beary Boy Die, Circle Punches, Rhinestone


Photobucket

Friday, March 04, 2011

Flourish Mushroom

This is a card made up of a couple of trial and mistakes.  The mushrooms had been sitting on my shelf since before Christmas and one day I accidentally set the flourish stamp on it wet.  Well I liked the way the accident looked so I kept it...sitting on my shelf  The backing was from when I was playing around with the tulip Impression Folder to see how to resize it.  That too had been set aside for a future use.  So I had some friends over the other night to make cards and I was digging through my scraps to see what I wanted to work on and these just fell together perfectly. 

Card Details:
Stamps: Teeny Tiny Wishes, Tiny Tags, Funky Four
Paper: Sahara Sand, Not Quite Navy, Soft Suede, Very Vanilla
Ink: Sahara Sand, Not Quite Navy, Soft Suede
Accessories: Framed Tulips Impressions Folder, Big Shot,Decorative Label Punch,pearls, Antique Brads


Photobucket

Friday, February 25, 2011

Build a Bear Surgeon

This was a super fun card to make. This card is going to my sister-in-law who is a surgeon. I had this idea after making her husbands card last month (Noah's Ark). If you can see the bottom of the Tulip Impression is not embossed.  All I had to do is let the edge hanger over the edge of the base before running it through the Big Shot.  If a bit did come through embossed then I rubbed it out with th bone folder on the back.  That way I did not have to stay within the lines.  I ran a dauber over the embossed areas to shadow them a bit more.  I cut the bill off of the baseball cap to get as close to a surgical cap as possible. The mask is made from the small oval punch layered.  The stethoscope is made from various edges of oval punches.  The ear tips are the bow tie cut in half from the Bearly Lovely Build a Bear Die.  The straps for the mask and the tie around the waist are very thin cut strips of paper and looped or tied (be very careful not to pull too tight when tying...not sure how I learned that)  I did cut a V in the front of the shirt and layered a white one behind it.  


Card Details:
Stamps: Teeny Tiny Wishes, Sanded Background
Paper: Marina Mist, Not Quite Navy, Whisper White, Chocolate Chip, Basic Black, Cranberry Crisp, Crumb Cake, Silver
Ink: Chocolate Chip, Marina Mist, Not Quite Navy
Accessories: Framed Tulips Impressions Folder, Big Shot, Build a Bear Die,  Beary Boy Build a Bear Die, Beary Lovely Build a Bear Die, Beary Essentials Build a Bear Die, Small Oval Punch, Wide Oval Punch, 1/2" Circle Punch, Punch Pack Circle Punch


Photobucket

Wednesday, February 23, 2011

Crowns

Wow, I got more time to make another card this week!  Forgive my photography but I cheated and took the picture with my phone...too lazy to get the big camera out.  When I saw the sketch this morning I knew I just had to do it.  So every spare minute I had between correcting, teaching and running the kids to music lessons I worked on it.  I knew I wanted to use the Concord Crush because my daughter has been asking me to use the ribbon for a very long time. To find the colors to go with it I used the Color Coach and i love the colors that they suggested.  This was a very simple card.  No sponging or fancy cutting just a couple of impression folders and crisp stamps.  What are crowns without a little bling?  These crowns where just crying to have rhinestones put on them so I also used them to dot the i's.  I trimmed every thing with white for two reasons. 1.) to make the ribbon match better and 2.) to make the colors cheerier.  I am seeing great possibilities for this set!

Card Details:
Stamps: Artistic Etchings, Bring on the Cake
Paper: Peach Parfait, Pear Pizazz, Concord Crush, Chocolate Chip
Ink: Peach Parfait, Pear Pizazz, Concord Crush, Chocolate Chip, Whisper White
Accessories: Rhinestones, Wide Oval Punch, Big Shot, Concord Crush 1/2" Stitched Poly Ribbon, Square Lattice Impressions Folder, Framed Tulips Textured Impressions Embossing Folder

Photobucket

Tuesday, February 22, 2011

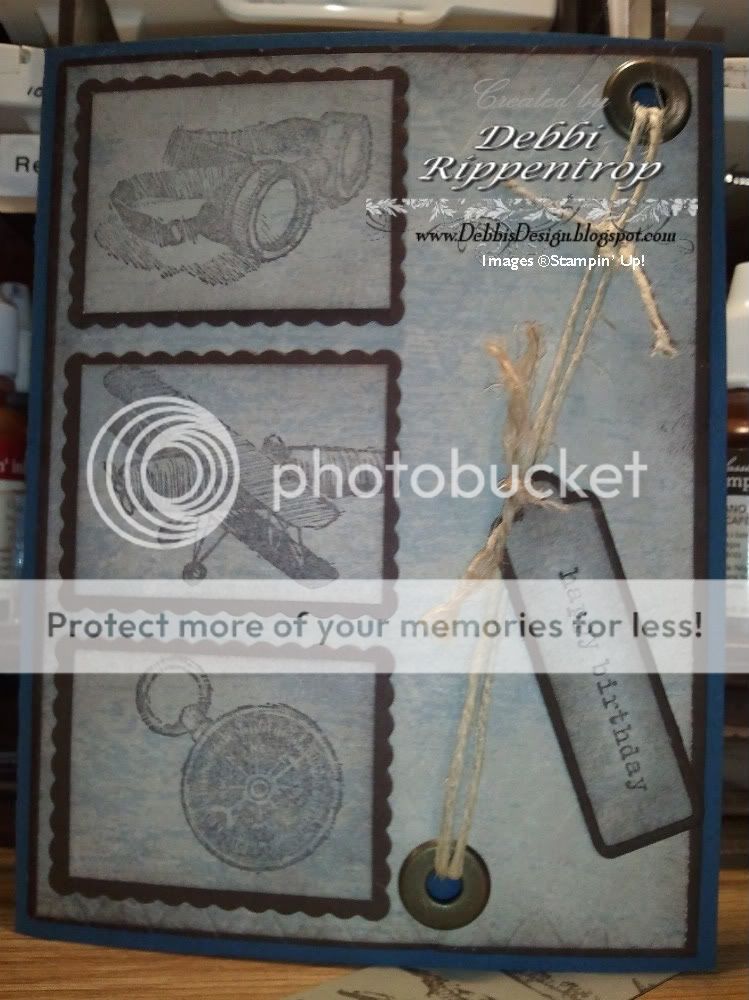
Just a Plane Birthday

I am sorry that I have not posted in so long.  I had quite a few blogs to design for customers and they have kept me nice an busy. Since we were snowed in yesterday (we could not make it out of the driveway not to mention the 20 mile drive to church) I took some of my day to work on a couple of cards that I am behind on mailing out...nothing new lately.

This is a set that I just could not go without from the Occasions Mini and the poor thing has just sitting there waiting to be put to work.  I knew that I wanted to use a Designer paper in the background and once I figured out which one the card just fell into place.  Yes, every edge is sponged to give it more f a vintage look, which I think goes great with this set.  It is hard to see in the picture but I did run the card stock through with Big Shot with the harlequin texture plate.   I never put the front on the card until I make sure it is finished that way if I add brads, ribbon or eyelets they are not poking in the inside of the card.


Card Details:
Stamps: Plane and Simple
Paper: Not Quite Navy, Blueberry Crisp Designer Paper, Chocolate Chip
Ink: Chocolate Chip 
Accessories: Scallop Rectangle Clear Die, Big Shot, Lots of Tags Die, Big Shot, Jumbo Eyelets, Natural Twine, Backgrounds 1 Texturz Plate


Photobucket

Wednesday, February 02, 2011

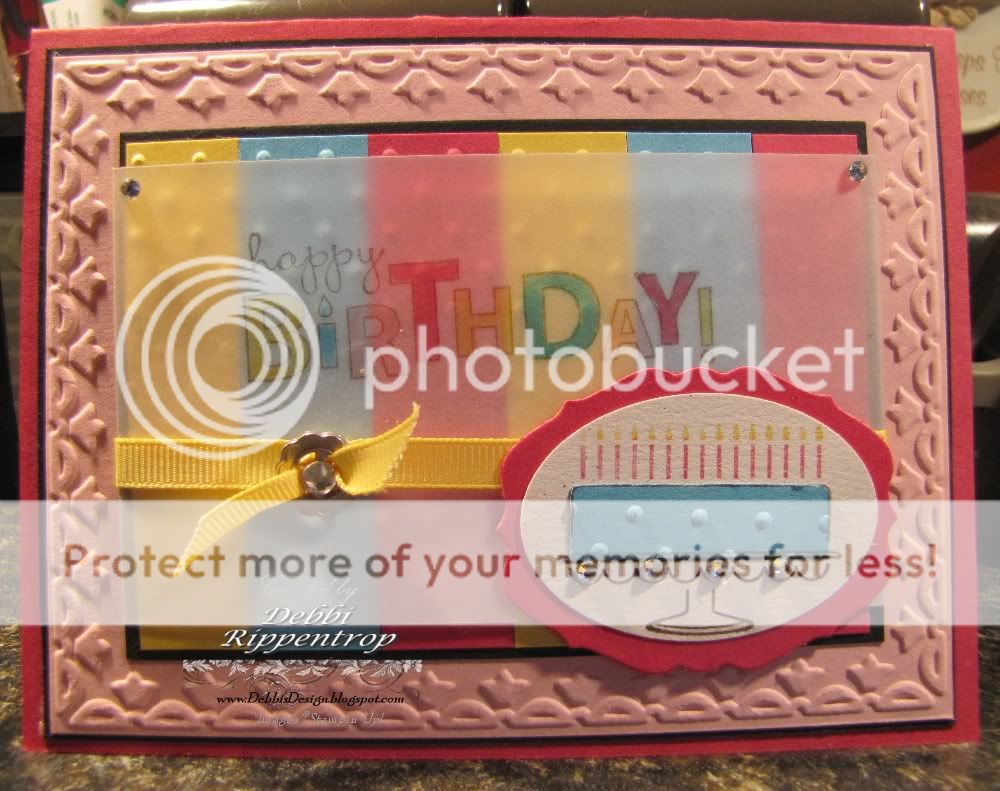
Rainbow Birthday Cake

My 8 year old Daughter needed a birthday card for a friend. She wanted it to be bright and very colorful.  She gabbed the new Color Coach and found the color she wanted dominate on the card.  He color was Melon Mambo.  She flipped over the card and it says to use Daffodil Delight, Pretty in Pink, and Tempting Turquoise as the go to colors.  So she go them all our for me and said "These are what I would like you to use Mom..." So I went to work.

Lucky for her I had just gotten my Sale-a-bration order in and was looking forward to working with some new things.  I have admired the new Framed Tulips Textured Impressions Embossing Folder Die.  I just had to put it on my first order and of course I had to use it on my first card.  The vellum adhesive is under the ribbon and the cake that way it is held on but not able to be seen.


She wanted lots of hardware and bling and I think she had gone through the whole catalog and picked everything out.  I let her pick out one piece for the Hardware kit and then she had to choose between the pearls or the rhinestones.  We added the small rhinestones on every other scallop on the cake stand, one in each top corner of the vellum and one large one in the center of the ribbon slide. The ribbon is two pieces, one is wrapped around the top layer and the other is tied and and the pulled through the ribbon slide.


Card Details:
Stamps: Bring On the Cake
Paper: Melon Mambo, Pretty in Pink, Basic Black, Tempting Turquoise, Daffodil Delight, Confetti White, Vellum Paper
Ink:Chocolate Chip, Markers-Melon Mambo, Pretty in Pink, Tempting Turquoise, Daffodil Delight 
Accessories: Framed Tulips Textured Impressions Embossing Folder, Perfect Polka Dots Textured Impressions Embossing Folder Die, Lots of Tags Die, Big Shot, Wide Oval Punch, Daffodil Delight 1/4" Grosgrain Ribbon, Basic Rhinestones, Hodge Podge Hardware Flower Ribbon Slide


Photobucket

Thursday, January 27, 2011

Eagle Birthday Card


I took sometime yesterday to get a start on the sketch challenge.  My #2 son has a birthday next week and I need to get his card mailed off so it will get to him on time at college. I must of bounced back and forth for a few hours before I decided to stay with the sketch and how I was going to put it together.  I had it all stamped and laid out and then someone threw the mail on my desk and whoosh pieces were every where.  So when I got up this morning I decided to start gluing things together before I had to run the boys to instrument lessons. The eagle was stamped and then run through the Big Shot with the die.  I have had the clear rectangle die for a while and have never used it.  Boy, was it easy!  I could see the image so I knew the image would be centered. I stamped another eagle and then cut around him as close as I could get.  I layered it as perfect as I could on top on the on in the rectangle with Dimensionals cut to fit. I do not think there was an edge that I did not sponge, as usual.  I do need to play with the Letterpress plates more.  I read somewhere that different papers make a difference...just need to give them a try.  Off to get this in the mail before I run the boys to basketball practice.

Card Details:
Stamps: In Wilderness, En Francias Background
Paper: Chocolate Chip, Naturals Ivory, Garden Green
Ink: Chocolate Chip
Accessories: 2 Step Bird Punch (leaves), Big Shot, Scallop Rectangle Die, Backgrounds 1 Texturz Plate, Northern Trim Letterpress Plate, Mini Library Clips, Brass Eyelets, Dimensionals


Photobucket

Saturday, December 25, 2010

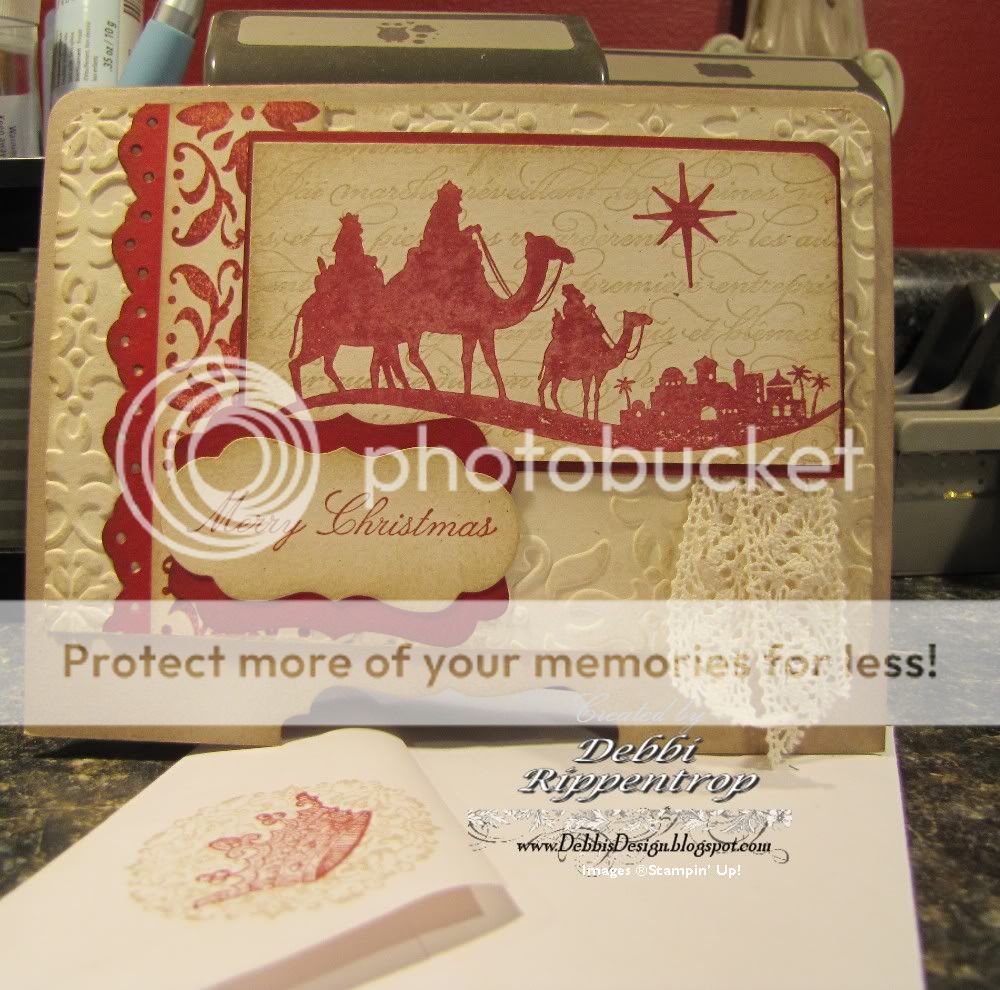
Merry Christmas 2010

Merry Christmas!!! I have not had much time to stamp the last few months because I have been working on these Christmas cards.  My boys have instrument lessons and basketball practice so I sit in my truck on an average of 3 hours a day waiting for them.  I used a lot of that time for assembly.  I pray you all have a very Merry Christmas and that you celebrate the true meaning of Christmas. God Wants You to Know.  I wanted  a vintage look so I did quite a bit of sponging.  I think there was not one edge left unsponged.

Card Details:
Stamps: Come to Bethlehem, En Francais, Envelope-Artistic Etchings
Paper: Naturals Ivory, Cherry Cobbler, Crumb Cake
Ink: Crumb Cake, Cherry Cobbler
Accessories: Big Shot, Corner Rounder Punch, Vintage Wallpaper Textured Impressions Embossing Folder, Decorative Label Punch, Lots of Tags Sizzlit Die, Eyelet Border Punch, Crochet Victoria Trim Ribbon


Photobucket

Monday, November 08, 2010

Wolf Birthday

This is a card that was sent off to my son for his birthday.  Today, 25 years ago, I became a mother for the first time.  Now my son has his own house & family and I am so thankful for the man he has become.  Happy Birthday Heath! I did a very simple card for him...and no pearls :(  I cut the back panels, stamped them, sponged them and ran them through the Big Shot.  The Jumbo brad needed a back up to make it show better and the circle punch was the perfect size.  My other son said the sentiment looked like a bone and so it went very well together...;-)  To do the background behind the wolf I had read some where that the new clear blocks worked great for this and so I gave it a try.  The only problem I had with this is I did not want to get the clear block dirty.  It washed up just great so I survived. 

Card Details:
Stamps: In Wilderness, Teeny Tiny Wishes, Sanded Background
Paper: Early Espresso, Garden Green, Naturals White
Ink: Early Espresso, Pacific Point,
Accessories: Big Shot, Corner Rounder Punch, Square Lattice Impression Folder, 1" Circle Punch, Modern Label Punch, 5/8" Jumbo Brad, Punch Windows Die

Photobucket

Friday, November 05, 2010

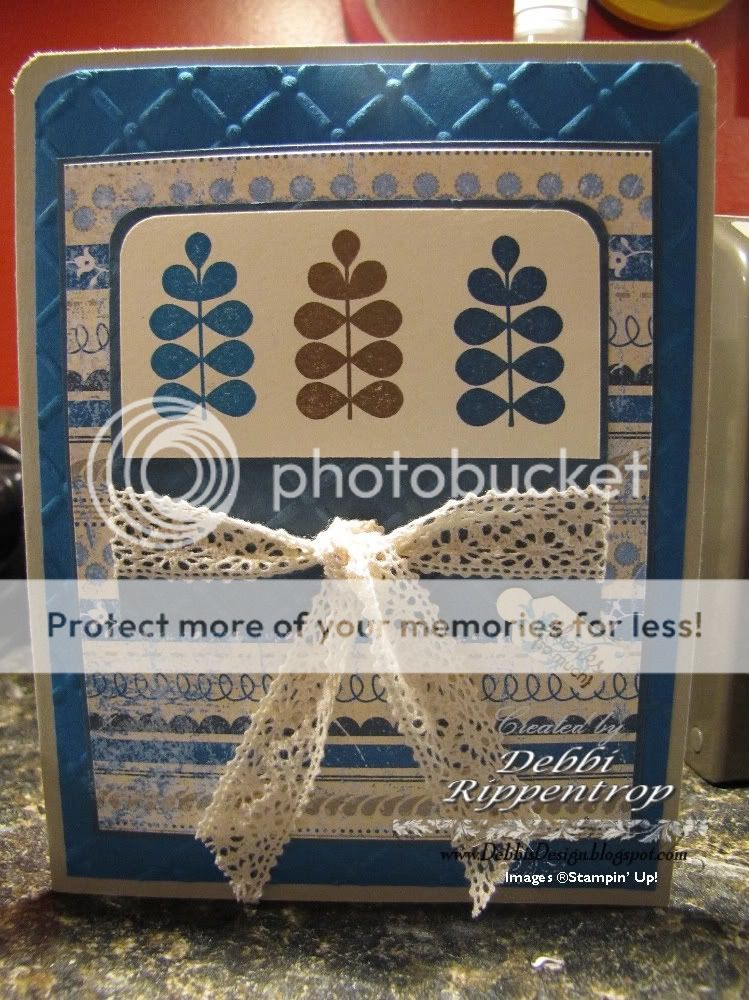
Pacific Thank you

 I just love browns and blues together and thought his was a great color combo taken from the designer paper. Can you tell that I love it, I just cannot get away from it.  I know I saw this sketch on a blog somewhere and I am sorry if the credit is to go to someone specific.  It is an easy one that I know I will be using again sometime. This was a very simple stamp, layer, no sponging (wow!), punch, impress card.


Card Details:
Stamps: Funky Four, Tiny Tags
Paper: Pacific Point, Crumb Cake, Blueberry Crisp DSP, Very Vanilla, Not Quite Navy
Ink: Pacific Point, Soft Suede, Not Quite Navy
Accessories: Big Shot, Corner Rounder Punch, Perfect Details Texturz Plate, Victoria Crochet Trim Ribbon, Jewelry Tag Punch


Photobucket
Related Posts with Thumbnails