Showing posts with label French Foliage. Show all posts

Friday, April 12, 2013

Fall Lattice

This was a fun, simple, quick card to make.  The sentiment was once again printed from the computer since I wanted a specific look and wording that was not available.  I used a Whisper White card base and cut it down to 4" x 5.25" and adhered it unto a 4.25" x 5.5" Early Espresso to make it a more firm base.

Details:
Stamps:  French Foliage
Paper: Early Espresso, Whisper White, More Mustard
Ink: More Mustard, Garden Green, Bravo Burgundy
Accessories: Large Oval Punch, Big Shot, Designer Frames Folder, Bitty Banner Framelits, Lattice Bigz Die

Photobucket

Friday, April 05, 2013

Fall Thanks


I love fall leaves and this set is so pretty to use to ,make beautiful leaves.  I stamped the image in More Mustard and used my markers to add more colors to the leaves.  The sentiment was just printed from the computer since I did not have any that said what I was looking for.


Details:
Stamps: French Foliage
Paper: Early Espresso, Very Vanilla, Bravo Burgandy, Crumb Cake
Ink: More Mustard, Bravo Burgandy, Garden Green, Early Espresso
Accessories: Extra Wide Oval Punch, Decorative Label Punch, Big Shot, Adorning Accents Folders, Designer Frames Folder

Photobucket

Monday, April 01, 2013

Casting Leaves

I have wanted to do this technique for quite some time.  It is so easy and produces a great card.  I cut all of my layers first and then removed the back layers.  I used a temp adhesive to hold together because I have a bad tendency to move things and I wanted it to stay lined up.  Then it is as simple as gluing all of the layers back in place.


Details:

Stamps:  French Foliage, Blessings from Heaven
Paper: Early Espresso, Whisper White
Ink: Cajun Craze, More Mustard, Bravo Burgandy, Garden Green
Accessories: None-Can you believe that? Lol

Photobucket

Monday, March 11, 2013

Fall Sympathy

This cards started out as a man's birthday card but when it was almost finished it looked more like a sympathy card.  That was just fine since that was another occasion that I had to check off of my "To Do"  list.  I am loving the Occasions Alphabet set, I do not know why I did not get it sooner!  To do the center part I punched out 2 squares on some printer paper and ran the brayer over it.  I also curled the edges of the scalloped oval punch to give more dimension.  It is also on Dimensionals to give it more of a pop. This card idea came from this card.


Details:
Stamps: French Foliage, Occasions Alphabet
Paper: Old Olive, Basic Black, Whisper White
Ink: Old Olive, Basic Black
Accessories: Large Oval Punch, Scallop Oval Punch, Big Shot, Stripes Impression Folder, 3/8" Basic Black Taffeta Ribbon

Photobucket

Friday, January 18, 2013

Fall Wreath


 I needed some fun fall Thanksgiving cards.  Since the leaves crumple and curl up, I though it fit for the card stock to be crumpled and curled up.  I love the Antique Brads and thought they fit the look I was going for here. How I do the crumpled paper: I stamp the images that I want on the card stock, then I run it through my crimper a few times, different directions.  After the paper is nice and loose I spray it with a bit of water and crumble it in my hand.  Once it is like I want it, I open it up to dry.  If you are wanting to separate the corner, it is easier to do while it is still wet.

Details:
Stamps: French Foliage
Paper: Early Espresso, Very Vanilla, Cajun Craze, Summer Starfruit
Ink: Cajun Craze, Early Espresso-stamped off once, Summer Starfruit
Accessories: 3/8" Stitched Satin Ribbon-Summer Starfruit, Linen Thread, Antique Brad, Big Shot, Houndstooth Impression folder,Labels Collection Framlits,  Piercing Pack-Festive

Photobucket

Wednesday, October 17, 2012

Birdy Birthday


Details:

Stamps: Four Frames, French Foliage, Teeny Tiny Wishes
Paper: Early Espresso, Very Vanilla, Cajun Craze, More Mustard, Colors Collection DSP-Regals
Ink: Cajun Craze, Early Espresso, More Mustard
Accessories: Big Shot, Woodgrain Impression Folder, Modern Label Punch, Decorative Label Punch

Photobucket

Friday, July 13, 2012

Fall Leaves


For the next few months I will be taking the cards I have had saved in draft and putting them up on my Friday's posts.  Things got a bit overwhelming in my household and my good intentions of having posts lined up for when I was off to doctor appointments did not go as planned.  I know some of these sets will already be on my retired list or no longer available.  I hope you can get some inspiration from them for a color, layout  or just something you can use to create a card you can share.  I will do my best to remember all of the things that I used to create the cards, not a guarantee!!!!    ;-) 

Retired: Concord Crush Card Stock, Concord Crush 1/2" Stitched-Poly Ribbon, Pear Pizzazz Card Stock, Peach Parfait Card Stock

Card Details:
Stamps: Perfect Punches, French Foliage
Paper: Whisper White, Pear Pizzazz, Concord Crush, Peach Parfait
Ink: Early Espresso, Pear Pizzazz, Peach Parfait
Accessories: Big Shot, Scallop Oval Punch, 1/2" Concord Crush 1/2" Stitched-Poly Ribbon, Square Lattice Impression Folder

Photobucket

Friday, January 06, 2012

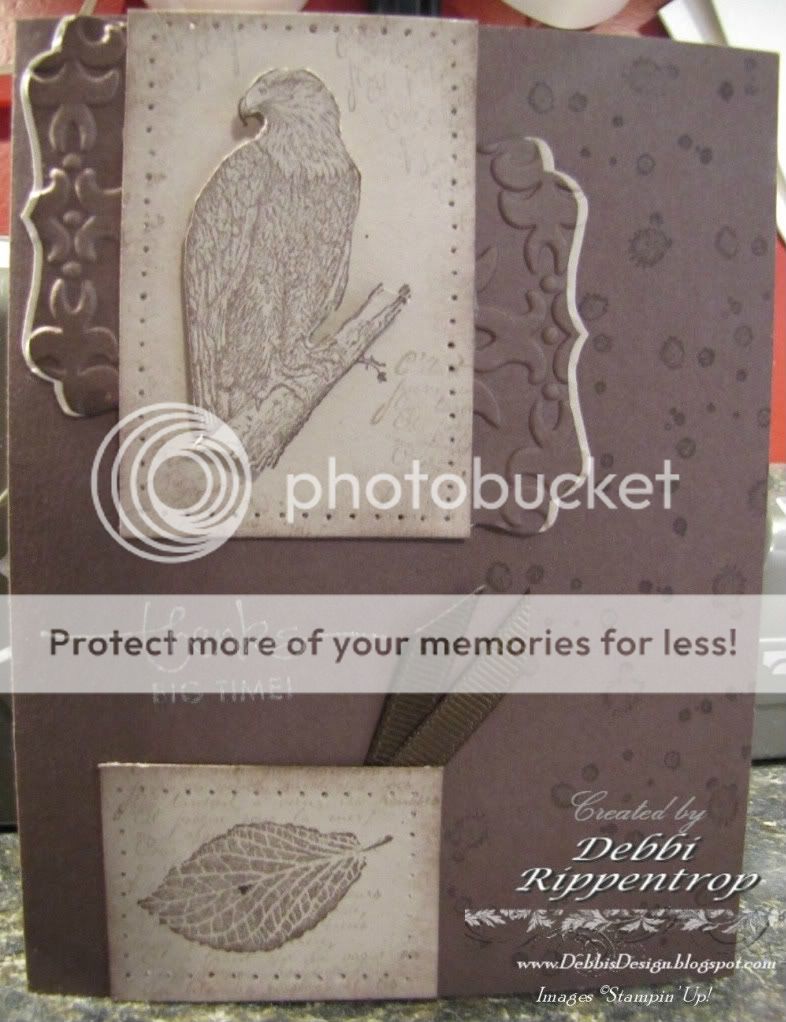
Eagle Birthday


This is a go to set for me when it comes to masculine cards, and most of the men in my family loves wildlife so it fits them too. To do the leaves I just stamped them in the lighter colors and used a marker to outline and put a few spots in the center, very simple yet gives a great effect.

Details:

Stamps: In Wilderness, French Foliage, Bring on the Cake 
Paper: Early Espresso, Very Vanilla, Cajun Craze
Ink: Cajun Craze, Crumb Cake, Peach Parfait, Early Espresso
Accessories: Extra Wide Oval Punch, Postage Stamp Punch

Photobucket

Wednesday, September 07, 2011

Fall Leaves


I know it is not fall yet, but the morning seems cool enough that the leaves will be changing soon.  I was in need of another masculine Birthday card and today's sketch was the perfect avenue to jump start this card.  the leaves were first stamped in the Cajun Craze and then outlined with the Early Espresso marker before putting it to the paper.  I also sponged around the edges after I cut them out.  They are adhered with glue dots. The designer paper had the trim all the way around the 12 x12 paper.Once I cut it down it only had the edge on 2 sides.  So I used the marker to doodle some lines an did some more sponging to blend it all in.  I used the Simply Scored Scoring Tool to do the double lines around the edge on the card base.  It needed something simple and it did the trick.  The Happy Birthday was in the middle of the Cake on the stamp.  I just used the marker to ink what I wanted to use.

Details:
Stamps: Bring on the Cake, French Foliage
Paper: Crumb Cake, Early Espresso, Well Worn DSP
Ink: Cajun Craze, Early Espresso
Accessories:  Simply Scored Scoring Tool, Word Window Punch, Modern Label Punch

Photobucket

Tuesday, July 05, 2011

Eagle Sketch


I have been able to make at least one card a week but then I do not have time to post them.  I just looked and I have close to 10 drafts set up with images and need to take a day to sit down and add the details.  Let's see what I can get done today. Maybe I won't seem like such a bad blogger.  I have been super busy with weddings and baby name frames. Hopefully I got good enough pictures and will get them up in the next few weeks.
I Love this eagle and just feel like he need to be cut out and popped up to give him dimension.

Card Details:
Stamps:  In Wilderness, French Foliage, A Word for You
Paper: Chocolate Chip, Crumb Cake
Ink: Chocolate Chip, Very Vanilla Craft
Accessories: Big Shot, Clear Embossing Powder on Sentiment, Decorative Label Punch, Vintage Wallpaper Embossing Folder, Piercing Tool, Chocolate Chip 1/4" Grosgrain Ribbon


Photobucket

Friday, January 14, 2011

Yoda Punch Card

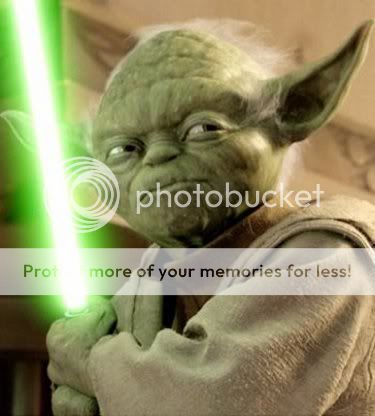
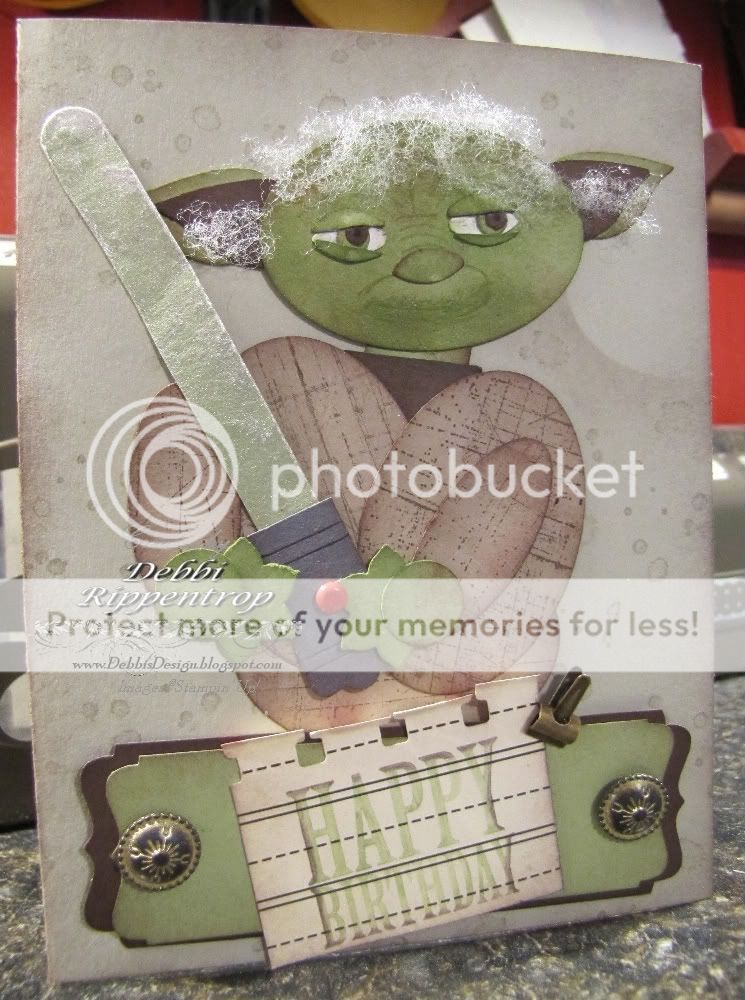
Well, today is the Birthday of my one of my son's best friends.  His mother is a very dear friend of mine and also a fellow paper crafter.  When I asked him if he had any ideas that he would like for a gift and a card he reminded me that Ryan loved Star Wars.  My son, Levi, loves punch art and asked me if I would be able to do a Star Wars punch art card.  After all of the time I had spent on my Noah's ark one I did not know if I was up to the challenge.  So days pass and he reminds me that the party is coming up really fast and asks if I had gotten around to the Yoda card.  So now it is not just Star Wars but a Yoda card.  So I did a google search and found this picture of Yoda to work from.


So I sat down and got to work.  All of my punches are either hanging on my wall (older version) or sitting on my desk (new version). So it was just a look around to see what would go together.  I tried to look at the image to see what would be the hardest to do and I found that to me it would be the eyes...so that is where I started.  I figured if I could not get the eyes to look right I might as well scratch it and start something else.  I looked at my punches and thought the end leaf on the Two Step Bird Punch would be just the right size for the eyes. So I punched the Whisper White and the Pear Pizazz (the color I thought would make the best Yoda) with the end of the leaf.  The eyeball parts are punched with the small and large of the Crop-a-dile (that thing is more handy then I ever thought it to be :) )  I just used my marker to put a black circle in the center of the Chocolate Chip.  The ears are from the same punch.  I just used the wing.  I did have to trim the Chocolate Chip just a smidge to get it to layer the way I wanted it to.  I used the same area of the leaf again for Yoda's button nose.  His fine white hair is the stuffing out of an old pillow I was throwing away.  One of my biggest delimas was how to get the light saber to glow.  My 8 year old daughter said "Why don't you just spray it with your shiny spray?"   Duh!  So I used the Vanilla Shimmer Smooch Spritz to give it some glow.


For my sentiment I wanted something fancy that went about the whole width of the card.  I cut my cardstock 11/4" wide and put it into the back of the Decorative Label Punch as shown above.  I did each end this way.  I trimmed the Pear pizazz just a smidge thinner so I could layer it.  I think that I once again sponged every angle I could get at.  I did have to use my tweezers to sponge and assemble the eyes but other than that it went together pretty easy.

 
I tried to make the background "Spacey" without being too cluttered.  So I sponged in a moon and added "stars" with the blotches from the French Foliage set. My son is very happy with how it turned out.  He cannot wait until the party next weekend!

May the Force be with You!

Card Details:
Stamps: Afterthoughts (Level 1 Hostess Set), French Foliage, Sanded Background
Paper: Sahara Sand, Pear Pizazz, Chocolate Chip, Whisper White, Crumb Cake, Basic Gray, Love Letter DSP
Ink: Pear Pizazz, Chocolate Chip, Sahara Sand
Accessories: 
Sentiment: Decorative Label Punch, Antique Brads, Spiral Border Punch, Mini Library Clips

Yoda's Head: Wide Oval Punch, Two Step Bird Punch, Pillow Stuffing, Markers for lines, Sponges for shadows
Yoda's BodyWide Oval Punch (3), Small Oval Punch (2), Hands: Boho Blossom Punch, 1/2" Circle Punch
Light Saber: Word Window Punch, Vanilla Shimmer Smooch Spritz, Modern Label Punch, Red Brad


Photobucket

Wednesday, September 29, 2010

Fall Leaves


Well, I worked around the upload problem....guess I will have to find time to figure that out. I just had to take time today to stamp, it has bee way toooo long!  My 1st of 3 surgeries is scheduled in less than 2 weeks and I am trying so hard to get everything in my house ready for my re-cooping not to mention home-schooling and running the kids to all of their events.

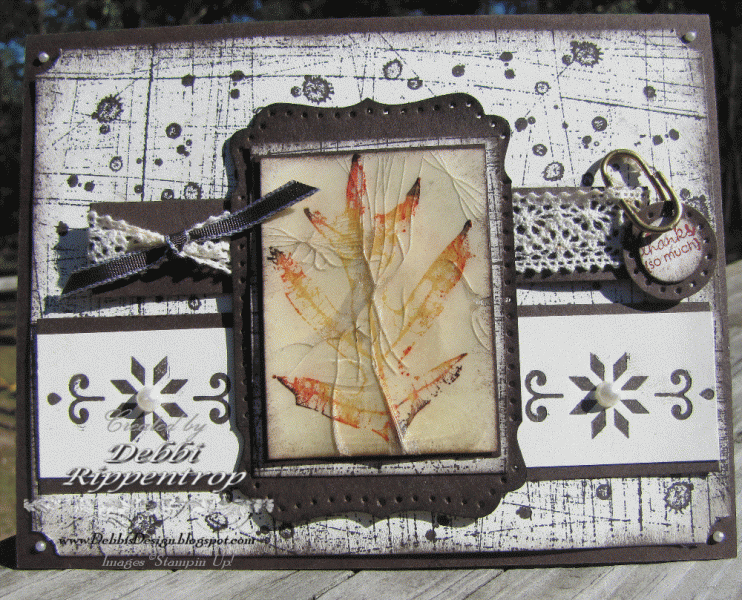
  After not stamping for a long time I really struggled with this card and almost gave up a few times.  I got a new order from the Holiday mini earlier this week and it has been just wanting to be played with.  I had 3 different images on the front before I finally had something I would even post.  Good news is I now have 2 other images to use on a card in the near future. I had the idea to elongate the new Decorative label punch so I had it all cut and put together and just had to have an image that fit in that space.  Because I made such a busy background I wanted to keep everything else pretty simple.  I did not think the silver clip worked as well with fall colors, and I am just a gold girl...don't own much silver besides my SU! jewelry.  So I heated up the clip and dipped in in the gold embossing powder.It is looped through the ribbon and held in place with the glue dots.  I love the new Letter Press Plates!!!  I still need a bit of practice but they are so fun and add just the right dimension.

I love the cracked Glass technique with the fall leaves.  It is so easy to do and just takes a few layers of Clear Embossing powder and a freezer.

I better get back to work.  Hope to see you all again soon!!

Card Details:

Stamps: French Foliage, Sanded Background, Tiny Tags
Paper: Early Espresso, Very Vanilla
Ink: Early Espresso, More Mustard, Cajun Craze, Versa Mark
Accessories: Crystal Clear Embossing Powder, Gold Embossing Powder, 1/2" Circle Punch, 3/4" Circle Punch, Victoria Ribbon, Early Espresso Taffeta Ribbon, Clip Assortment, Basic Pearls, Northern Trim Letterpress Plate, Decorative Label Punch, Big Shot, Piercing Tool and Mat Pack
Techniques: Cracked Glass


Photobucket
Related Posts with Thumbnails