Showing posts with label Coluzzle. Show all posts

Wednesday, April 30, 2008

Sketch Flower


Today was the Sketch Challenge. I love the fact that I can use this to start a card. I think it makes it so much easier to have a sketch started. I love to look at the gallery to see how other people interpreted the sketch. it can go in so many directions. The flower was embossed with Perfect plumb and then colored in with re-inkers and the aquapens. I went sloppy since I was cutting it out I did not have to stay in the lines. I then just added some more e\ink tot he spots I wanted to shade. I used the gel pen to make the dots around the edge of the large oval. The ovals I cut out with Coluzzle. I just curled the flower on my fingers after I cut it out. I'm trying to use sets that have been put away for awhile. We have had no snow for a few days so here comes the flowers again! I sponged Pale Plum around the edge of the Whisper White oval and White Craft around the edge of the Perfect Plum oval.

Card details to be posted very soon

Wednesday, April 09, 2008

Distressed Butterfly


Ok, when I saw this sketch last night I was a little concerned about how I would make this work. I started by figuring I wanted to use some designer paper. So off to my stash I went. I love the Afternoon Tea paper! I used my Coluzzle to cut my ovals. The scalloped one I just went around the outside edge with the corner rounder (guide removed). I used the mat kit to do the piercing. I pierced 3 and skipped 3 all the way around curving as I went. The outside layer is the same size just without the scallop cut away.

The background was first done with bleach and then I used the Close to Cocoa. I did not want the stamp on the bottom to over power the butterfly so I just used the top of the stamp on the bottom edge. The center butterfly has a rhinestone brad from the Pretties Kit and is popped up with a pop up glue dot that is cut in half. I used the rub-ons on the ribbon (another thing I've wanted try do off my list!). I did do some sponging around the Close to Cocoa Oval to give a little more dimension.

Stamps: Sanded Background, Essence of Love
Paper: Afternoon Teas DSP,Close to Cocoa, Groovy Guava,
Ink: Bleach, Close to Cocoa
Accessories: Eastern Elegance Rub-Ons, Pretties Kit, Wide Chocolate Chip Grosgrain, Coluzzle, Mat pack for Piercing, Corner Rounder for scallops, Pop up glue dot

Wednesday, March 12, 2008

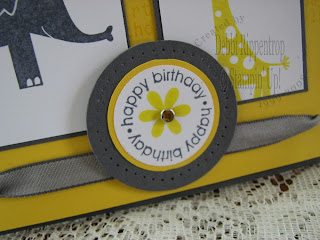
Yoyo Birthday


The Sketch challenge today was a great one. I am short on kids cards and I love this set to use for kids. I was trying to use as little as possible and make it simple today. I wheeled the Happy Happy Birthday Jumbo wheel across the top.Wednesday's are the short days in my week. Wednesday's schedule is crazy. Hope you all have a great day and happy stamping!

Stamps: Happy Happy Birthday Jumbo Wheel, Wild About You, Think Happy Thoughts
Paper: Basic Gray, Yoyo Yellow Whisper White
Ink: Yoyo Yellow, Going Gray
Accessories: Ticket Corner punch, Coluzzle, 1 1/4" Circle Punch, Circle Fire Rhinestones, Basic Gray Taffeta, Tool kit for Piercing

Friday, March 07, 2008

Congrats Stars


This was a fun card to make! This was for a demo challenge. Once a month two sketches and 3 color combos are posted. You have to put something together from those options. I do not visit there as often as I would like. There are only so many challenges a girl can do on limited time. I always love it when I get a chance. I need to read the directions on my crop-a-dile better. Every now and them I am butchering my eyelets because I just grab and do not pay attention to what setting I have it on. I guess it is tunnel vision...

Card details to be posted very soon!

Tuesday, December 04, 2007

Time Spent


So it is freezing outside so with today's Color Challenge I decided to put a little bit warmth. This again is the set that SU sent us as a gift this year. It will be available in the new January calendar as a hostess set. I stamped the big flower on the designer paper and cut it out. I colored the outside edge and spots with the marker. The center was colored and stamped again on the Old Olive and Summer Sun, cut out and mounted in layers. The flower its self is on a pop-up glue dot and the Center Old Olive is also. The Summer Sun Flower is just held on with a glue dot. I pierced around the outside of the large circle with the tool kit. I just puncture and shift the grid slightly as I turn with the tool still in the paper. I decided to put the words on the ribbon and stamped it with craft ink. It needed something behind, so I turned to my trusty punches. The retired accessory list comes out next Monday and I so hope none of my punches will be going away! I wanted to use eyelets in the corners but I did not have any the color I wanted. I could of made some with craft ink and embossing powder but I am having some ladies over tonight to make ornaments and need to get the laundry put away...so I cheated again and made faux brads with the double circle punch.
Stamps: Time Well Spent
Paper: Old Olive, Certainly Celery, Summer Sun, Certainly Celery Prints Designer Paper
Ink: Basic Black marker, Black Stazon, Old Olive Craft
Accessories: Coluzzle Circle, Double Circle Punch, 1 3/8" Circle Punch, Label Punch, 5/8" Celery Grosgrain, Tag Corner Punch

Monday, August 13, 2007

Bunches of Thanks


Oh, to take the time to stamp again. Today's techniques challenge on SCS was to make a View master card. I have wanted to do one of these for so long but just have not had the time. This was not a Monday morning challenge after being sick for so long. Not something to jump back in to. I must of re-done it at least 4 times. The thing that stumped me was what to do with the brad. After I had figured out to use the punch there I decided to use the punch as the background. I then used the punched out area and sponged the banana ones. The bummer is you do not get to see the rest of the things I have stamped in the turn area. I have the pineapple drink, the monkey, the heart, and another Thank you. I stamped the background with the Sanded and sponged the Chocolate Chip around the edges. The Technique tutorial can be found here.
Stamps: Monkey Business, Sanded Background
Paper: Very Vanilla, Chocolate Chip, Barely Banana
Ink: Barely Banana, Chocolate Chip, Old Olive (Banana) On the things you cannot see- Ruby Red (Heart) More Mustard, Ruby Red, Garden Green (Pineapple)
Accessories: 5/8" Chocolate Chip Grosgrain, Fire Circle Rhinestone,Punches- 1 3/8" Circle, 1 1/4" Circle, 1/8" Circle, Large Oval, Snow Blossom, Coluzzle
Techniques: View Master


Monday, July 30, 2007

Cut Out Bronc


So today's Technique challenge on SCS was to do a cut out card. These are so fun to do. I love this new bronc set so just had to grab it again. The horse and words are embossed. The words I tapped off extra hard because I did not want a pure look. I wanted it to look a little roughed up.
Stamps: Bronc Buster, Flannel Background, Define Your Life
Paper: Basic Black, Basic Gray
Ink: Craft- Basic Black and Whisper White, Classic-Basic Gray
Accessories: Gray Taffeta, Silver Brad, Coluzzle Oval, clear Embossing Powder, White Embossing powder
Related Posts with Thumbnails