Showing posts with label Altered Art. Show all posts

Wednesday, June 22, 2011

Altered CD Case

My daughter wanted so badly for her friends to have these as a thank you gift for coming to her 9th birthday party.  I had ordered some of the Clear Mount Stamp Cases (4 for $4.95).  We measured the lining, scored the folds and started decorating.

She loves to sponge edges as much as I do so she had very pretty finger tips when she was done.  To do the Crown we stamped and embossed first.  We then masked the crown with another crown that I had stamped and cut out on a piece of scratch paper.  So when we stamped the "My Friend" it looked like it was behind the crown.  The butterfly was sprayed with the shimmer paint/rubbing alcohol mixture to give it just a bit of glimmer.


The inside we decided to put a post-it note pad, pen held on with a cable clip and a pack of gum stuck on with glue dots, all she thought we needed to add was a stick of lip balm...but we do not have any stores within a 30 min drive so she got what I had on hand. ;-)  (Her friends loved them anyway!)
Card Details:
Stamps:  Artistic Etchings, Perfect Punches
Paper: Love Letter DSP, Cherry Cobbler, Daffodil Delight, Garden Green, Basic Black
Ink: Versa mark, Cherry Cobbler Sponging- Cherry Cobbler, Crumb Cake, Daffodil Delight,
Accessories: Big Shot, Beautiful Butterflies Die, Designer Label Punch,  2 Step Bird Punch, Itty Bitty Shapes Punch Pack, Naturally Serif Alphabet Die, Boho Blossoms Punch, Crop-a-dile:Flower Center, Small Heart Punch, Scallop Trim Border Punch

Photobucket

Friday, August 21, 2009

Clipboard


Well, here is the clipboard that I told you about awhile back. I told you I had a young lady over to work on 4H projects for the fair and this is what the finished project looked like. Her mother just sent me the picture. I think it turned out great. majority of it is covered in Modge Podge to make it last longer. She stamped each month alternating colors to coordinate with the colors here. The ribbon is layered and then ruffled with glue dots. I do believe she sponged around the edges of the butterflies and the flower. The build-a-brad on the ribbon is a flower punched from the designer paper. The calendar was printed on Whisper White Cardstock from a calendar created in Microsoft Publisher.

Stamps: Inspired by Nature, En Francias Background
Paper: Whisper White, Regal Rose, Rose Red, Baja Breeze, Old Olive, Designer Paper
Ink: Rose Red, Baja Breeze
Accessories: Clipboard, Beautiful Butterflies Dies, Pearl Halves for Pretties Kit, Regal Rose 5/8" Grosgrain Ribbon, Basic Black 1/4" Grosgrain Ribbon, Build-a-Brad, Corner Rounder, Modge Podge, Top Note Die, Little Leaves Die, Daisey Flower Die, Post it pad

Signature

Monday, October 27, 2008

Pages for Calendar

So I thought today I would post the pictures of the inside of the calendar I made. A picture can be put on each page. I designed each page to match the color of the month tab along the side. Again, I will be holding this class the first week of December. If you are interested please contact me RSVP must be by November 16th. Details for the outside can be found in the Calendar post. Each picture can be clicked to enlarge and will open in a new page.


Tuesday, October 21, 2008

Calendar

Today I needed to finally take time and work on my calendar project. I will be holding a class for these the first week of December. This is from the calendar kits that we have right now in the Holiday Mini on page 3.
We will be taking the kit and turning it from a loose leaf calendar into a free standing scrapbook calender. I'm still working on the inside pages, but they will be ready to see at Stamp night on Thursday. I've used the On Board Book Basics (small) on page 180 of the catalog to make the front and back. You will have to shorten the calendar pages a bit to make them fit, but not enough to make a big difference.

Supplies:
Create a Calendar 09 Kit
Bashful Blue Patterns Designer Series Paper
Old Olive Patterns Designer Series Paper
Pumpkin Pie Patterns Designer Series Paper
Chocolate Chip Cardstock
Whisper White Cardstock
Bashful Blue Cardstock
Pumpkin Pie 1/2" Striped Grosgrain Ribbon
Old Olive 5/8" Grosgrain Ribbon
Bashful Blue 1/2" Striped Grosgrain Ribbon
Riding Hood Red 5/8" Striped Grosgrain Ribbon
Corner Rounder Punch
Scallop Square Punch
Spiral Punch
Bashful Blue Craft ink to die the edges of the Chip Board
On Board Book Basics (small)
Rubi Coil Binder

Thursday, June 12, 2008

Friends Picture Frame


What a freaky coincidence! Yesterday my daughter had a small birthday party, just a few friends over. I took their picture right away and printed them out. One of the projects I had planned for them was to decorate their own frames. I bought the 8x8 frames at the dollar tree. I gave them the mat and let them decorate them how they wanted to. I saved my daughters because I wanted to do hers up special for her. While they were playing some games I put them in frames and added the pictures. It was one of the gifts they took home with them. So today I wake up and what is the Ways to use it challenge?!?!...to use a picture. So I got to finish her frame today. The bottom corner rub on is done on the glass, but the Forever and ever is on the paper. I love it and plan on doing this every year with the girls. They had a lot of fun and their moms loved the idea. Tomorrow I will show you another project I did with the girls....

Stamps: Blossoms Abound, Dotted Background
Paper: Whisper White, Close to Cocoa, Regal Rose, Rose Red, Old Olive, Chocolate Chip
Ink: Certainly Celery, Old Olive, Rose Red, Regal Rose, Black Stazon, Chocolate Chip
Accessories: Scallop Circle Punch, Corner Rounder, Boho Blossoms Punch, Always Artichoke Brads, Regal Rose 5/8" Grosgrain, Chocolate Chip Poly Twill, Eastern Elegance Rub Ons, 1/4" circle punch


Monday, January 07, 2008

Clipboard


Today I had an order for a clipboard for someone's Secret Sister. I modge podge over it so it was hard to get a good picture. The top half is to insert a picture into and the bottom half is a post it pad. Her colors where brown and green so this DSP was a perfect fit.

Friday, December 21, 2007

Altered Starbucks Bottles

So today I was trying to finish some Christmas presents. These will be going to some very dear friends of mine. It was a funny thing that yesterday while I was out buying these that the Ways to Use It challenge on SCS was to Wrap it up. So I used this for that.

This bottle I used the new SU Rub-ons. They take a little getting used to but I love how it turned out!

This one I etched flowers and hearts in ovals on the glass. It is filled with lots of fun embellishments.

This picture did not turn out as well as I would of liked, but it is so hazy and gloomy out today, it is hard to find a good place to get good light. For those curious; behind it is a tote of gifts I had to wrap today to take to my in-laws.

Stamps: Time Well Spent
Paper: Chocolate Chip, Brocade Background
Ink: Versamark
Accessories: Rub-ons on one bottles, White detail embossing powder, Etching Cream


Have a Very Merry CHRISTmas!!!

Thursday, December 20, 2007

Glass Brick Tutorial


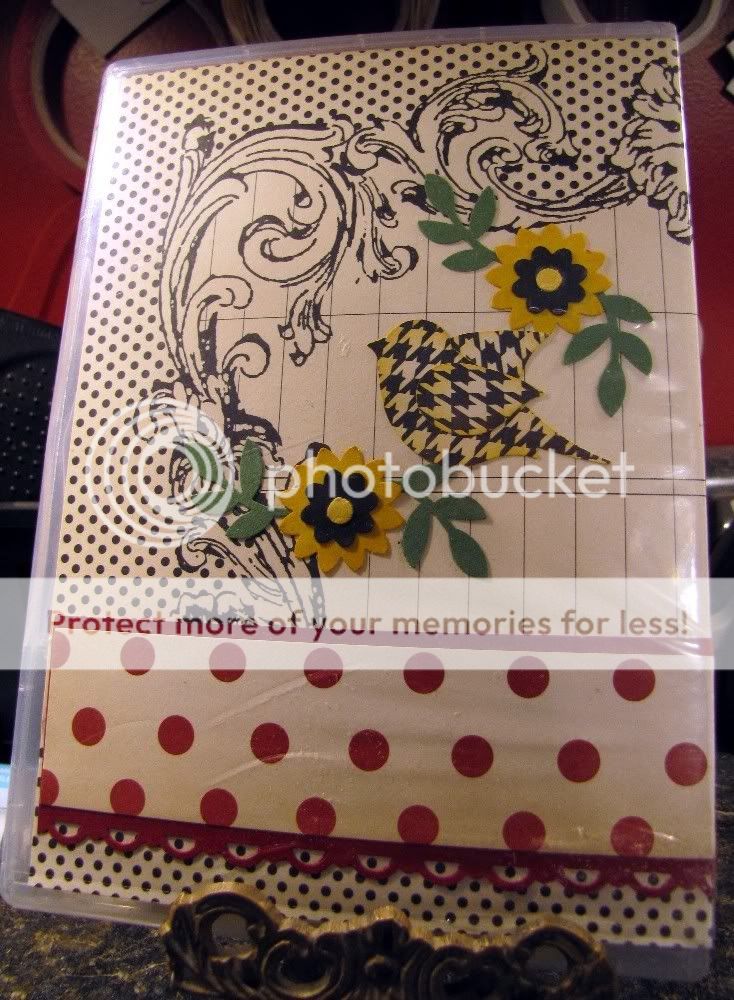
So today I thought I would throw in a tutorial on how I do my glass bricks. This is a completed picture of a couple that I finished. They are really had to get a good picture of. If you click on the picture it will open it larger in a new window.

The supplies I used are:
Drilled Glass Brick (my husband drilled a hole with a glass bit)
I used and 8" x 8"
Versamark Ink
Stamp Set
Embossing Buddy
Embossing powder
Glass cleaner and rag
Etching Cream
Rubber Glove
Lights and Ribbon to decorate
Contact paper or any masking type tape

To get a good image the surface has to be very clean. Make sure you have no finger marks or smudges at all.

I then use my Embossing buddy.


I tap it on to get a good coverage of powder on the glass. Be careful not to touch the glass with your hand at all. I then just blow off the extra dust.


I ink up my stamp with my Versamark pad.


Stamp your images on the object being very careful not to touch anything but the outside edge with your hands. The powder makes it easier to see the image and to keep stray embossing powder off the glass. If you see an error in your image at this point it is still easy to fix. Just rewash and start again.


After you have your image(s) stamped on the object as you wish then dump on the embossing powder. I am using White detail embossing powder since I have chosen a fine detailed stamp.


I shake the powder around and dump it off. I sternly tap the brick on my scratch paper to remove any extra powder. Once again double check your image. This is still any easy time to fix any errors in your image. If there is something wrong, wash and start again. If not heat up that gun!


Heat your image throughly with a heat gun. Be very careful to make sure everything gets heated. I have found bricks and plates no problem to heat. I have attempted to do a piece of glass and the heat gun cracked the glass. Make sure your object will be able to handle the heat gun or that it is easily replaceable.

After the image is embossed it will have a nice glossy look. If anything is still broken or light make sure to heat it again. If not that area will not turn out. The washing or etching cream will remove the powder if not heated well. If at this point you see a mess up let the object cool and use a hobby knife to scrap off the area that needs repair. Scrub clean and start that area from the beginning. If you used more than one stamp and only one needs repair only that one needs to be removed. The heated embossing powder will withstand washing.


If there is any part of your object you do not want etched now is the time to mask that off. I just use scraps of contact paper I have left over from another project.


Now is another time to make sure your object is totally free of any finger prints, or stray powder. Anything left on the glass will effect how you glass is etched. So make sure it is perfectly clean. Also make sure your masking tape is secure and pressed tight.


Next I just dump on the etching cream.

I use a plastic spoon to spread around (never use metal).

Spread quickly keeping the cream thick all over the image. If the cream sits longer in one area it will effect the evenness of the etching.


After it has set on the glass for 5 minutes I put on my protective glove. I used to use a sponge to remove the excess cream but I found it was just easier to wipe it with my finger back in the jar.


I wipe off all the excess cream I can get off. The cream can be used over and over again. You will notice the first time you use it, it is the consistency of elmers glue. The more it is used it will get thicker. When it gets to a thick paste form I just throw it out as it is too hard to spread evenly fast.


After I have removed all of the cream I run it under very hot water. We have an outdoor wood burning stove so our water gets very very hot. If that is the case be careful so the brick will not crack because of the heat. Rinse off all of the cream and remove the masking tape.


If your water is nice and hot the embossing powder will wash right off too. If not you will have to scrub it off. I just use a plastic dish scrub or a plastic spoon will work too. Continue to wash until everything is off of the surface.


Prior to etching I have removed all of the white paint that comes around the edges of the brick. This is easy enough done by soaking in warm water. I then just took a brush and scrubbed it off. This can be done either before or after etching. I then use a decorative ribbon around the edge. It can be fastened on with either adhesive of glue dots. For the 8" x 8" bricks I used a 35 ct white lights. Colored light also look very nice.

ENJOY!!

*Edited to add- I bought the bricks and lights at Menards. I went back yesterday to get more lights and could not find the small count at any store. Thankfully a friend found them in another city for me so I could finish my orders. So they are now very hard to find!
Related Posts with Thumbnails