I have read questions on how to round the corners of your pictures. This will work for pictures to be used with any of the punches. This will take more than work in MDS and I do not know how much the reader is familiar with this type of work so I am going to try to do as many steps as possible.
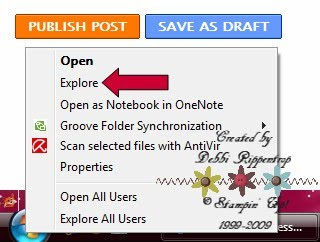
I am working in Windows Vista and I know it will work the same in XP. My copy of Windows 7 has not yet arrived so I am not sure on that. To start you will need to take your mouse and hover over your start button in the lower right corner of your desktop and right click on it, choose Explore.
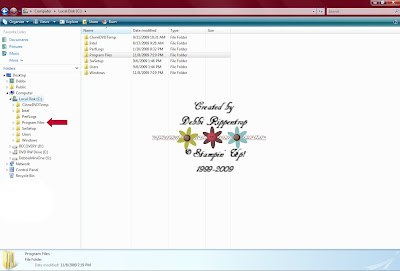
It will take you to a section on your computer where you can view the contents of your hardrive(s). Under your C: Drive you are looking for a folder named "Program Files" Click on the arrow next to that.
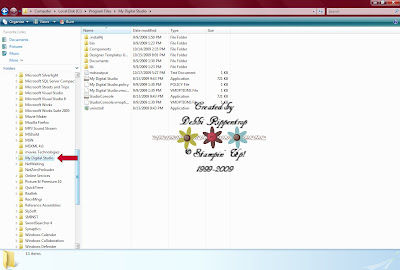
It will open up all of your program files. They are in alphabetical order and you are now looing for one named "My Digital Studio". Once again, click on that arrow.
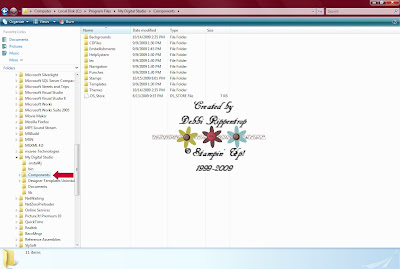
Under My Digital Studio is a file named "Components"....arrow.
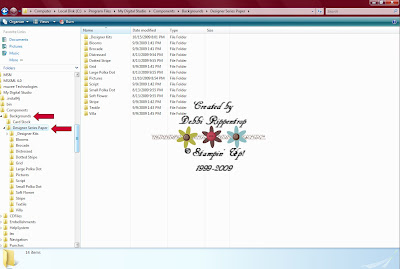
Backgrounds...arrow will give you a view to Designer Series Paper. Here is where our work begins.
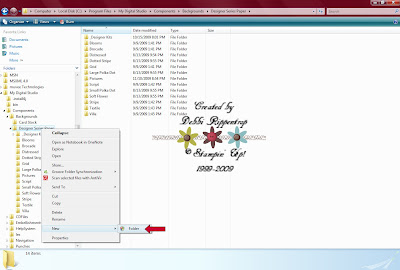
If you are working with Vista you can right click on the Designer Series Paper Folder and your options will appear New and choose folder. If you are working with XP you will have to click on the Designer Series Paper folder, go to the upper left hand corner/ File/ New /Folder. You will now have the option to name your Folder. I named mine Pictures.
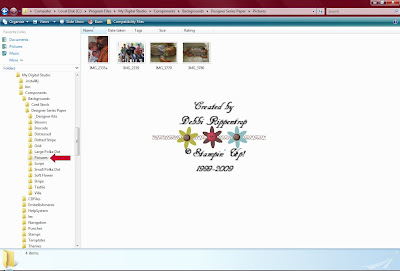
So now that I have a new folder in the correct area I can put the pictures I want to work with. I just went to my picture folder, clicked on the images I wanted ctrl +c (copy). I then went back to the new folder I created in MDS and ctrl +v (pasted) the pictures. I, personally did not want to move them there because it will be easier to just delete them from my MDS folder when I have finished with them then to move them back to where I store my pictures.
The hard part is over, now onto the fun!
Some programs will not let you alter folders and still be effective until you re-start the program. I created the folder and moved the pictures in while I had MDS open and they showed up immediately.
The hard part is over, now onto the fun!
Some programs will not let you alter folders and still be effective until you re-start the program. I created the folder and moved the pictures in while I had MDS open and they showed up immediately.
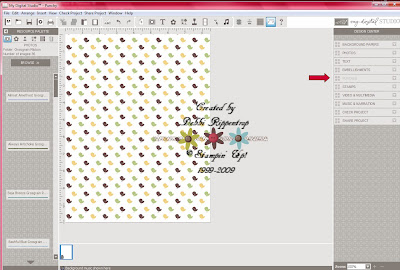
I started an 8.5 x 11" blank page and have already put in a background that I plan on using. Next I am headed to the punches.
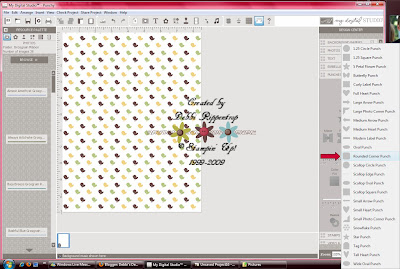
I am going to choose the Rounded Corner Punch but like I said when I started this will work with any of the punches.
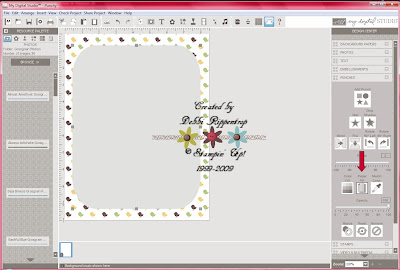
Here I have stretched the punch to the size that I want it to be on the page. This really can be done at any time but I know I want this picture to take up most of the page so I did it right away. Then I am going to click the Paper Fill option.
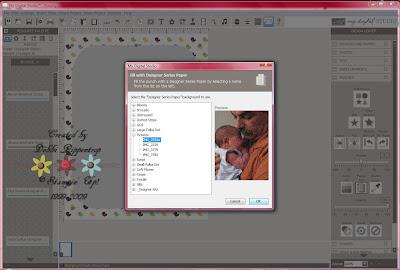
Here I will find the picture folder I have created right along with all of the Designer Series Paper folders. So I am going to click on the images until I find the one that I plan on using. I am going to use one of my husband and our wonderful grand-daughter right after she was born.
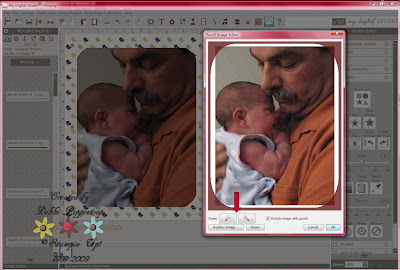
After you hit Ok your image will appear on your page. It more than likely will not turn out just as you want it the first click. You will need to double click on your picture to get the edit window to pop up. You can see that my picture is actually too small (white sides) for how it was originally set. If I left it that way and I wanted to add a matting, as I do, it would fill in the white sides before it started the matting. Guess how I found that out.... So I am going to adjust the picture larger or smaller with the Zoom buttons.
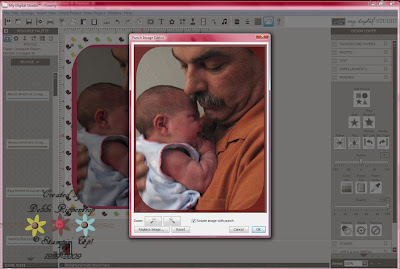
So now you can see that I made the picture to fit the punch. You can also click and drag the picture around to get it to fit just like you want it to. Off to embellish the rest of the page!

Can you tell she had Grandpa wrapped around her finger even before she was born?
I hope this has given you something new to try on your MDS. Let's see what I can come up with next week! If you have any requests please post them here!


Thanks for posting these instructions!Had to try it immediately!
ReplyDeleteThank you for posting the MDS tutorial, I am slowly but surely learning the program and love tips any time I can find them. I found your blog on SC and am now following you.
ReplyDeleteThank you for sharing your knowledge with the MDS!!!
ReplyDelete