
Non-MDS related but boy do I love the Snipping tool feature on Windows 7. It sure makes the screen capture option old news. On to MDS.
So today I am going to show you how I make the Drop Shadow feature do double duty. I know when I make a card and put it up on dimensionals or Pop up glue dots, it is up there and seems to be all the way around so that is what I was striving for here.
So today I am going to show you how I make the Drop Shadow feature do double duty. I know when I make a card and put it up on dimensionals or Pop up glue dots, it is up there and seems to be all the way around so that is what I was striving for here.
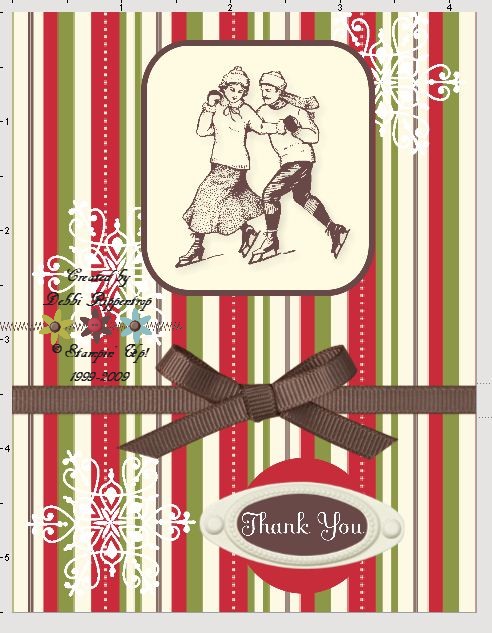
Here is the card I am starting out with.

Now I have clicked on the punch behind the image and went to the Drop Shadow button.

This little box will pop up with all of your options. You can adjust how heavy you want the shadow and how deep you want it. You can even change the color of the shadow, for this card I will be leaving it black.

As you can tell the shadow is on the right and the bottom of the punch.

With my punch still clicked I am going to go up to the toolbar and first click the double paper which will copy what I have clicked. Next I will go to the straight clip board which will paste the image I just copied exactly on top.

As you can see my pasted copy is on top but the shadow is still all on the left and on the bottom. So I will need to take care of that.

I have opened the drop Shadow box of the new pasted punch. Can you see that where the arrow is pointing is telling me the offset of both the punches. I am going to need to change that to the complete opposite.

You can either grab the shadow and drag and drop it. Since I am going for a specific number and not just what looks good I am going to use my arrow keys to change it. So I just went for 5/5 to -5/-5. As you can see the shadow for the new punch is on the top and on the right,

Here is the punch with a shadow all the way around, but I think I would like the image on the top...

Back to the toolbar to find the Change Object Layer Button. I am going to choose the Send to Back option.

So now I have my card finished with 2 punches exactly on top/bottom and the shadow all the way around the element. I think this makes it look like it is standing right off of the card.
I hope this has given you something new to try on your MDS. Let's see what I can come up with next week! If you have any requests please post them here!

I was ecstatic when I started using drop shadow. Makes all the difference in the world. Great tutorial. Love the project here too!
ReplyDeleteThis is awesome Debbi.. I love your tips and tricks.. thanks so much for sharing... MERRY CHRISTMAS and great xmas pic card you made.. it's beautiful.
ReplyDelete