Tuesday, July 12, 2011

Baby Rattle

I was in the need of a baby card for a little girl....so I went blue?!?!  The reason was I also did a name frame, which you will see on Friday, and I wanted the card to go with the frame.  I make my frames so that they hopefully will grow with them so I try not to do them in a babyish manner.  So the card took on that look to begin with.  I think the rattle made it turn back to the baby card and the ruffles gave it a feminine look.  I love, love, love the new Lace Ribbon Border Punch.  I have not been able to stop using it.

Card Details:
Stamps:  Short & Sweet
Paper: Soft Suede, Baja Breeze, Not Quiet Navy, Blueberry Crisp DSP
Ink: Not Quiet Navy
Accessories: Big Shot, Framed Tulips Embossing Folder, Lace Ribbon Border Punch, Eyelet Border Punch,  1-3/4" Circle Punch, 3/4" Circle Punch, 1/2" Circle Punch, Marina Mist 1/8" Taffeta Ribbon, Basic Pearls


Photobucket

Friday, July 08, 2011

Father's Day Tri-Shutter Card


This one was made right before the retiring list came out.  The Cogs punch was a punch I just "had" to have.  This was the first time (and last) that I used it. I had to use the eagle on this card since my father has collected eagles for many years.  He loved it.

Card Details:
Stamps: In Wilderness, Plane and Simple, Wonderful Favorites
Paper: Blueberry Crisp DSP, Not Quiet Navy, Chocolate Chip, Basic Gray, Very Vanilla, Crumb Cake
Ink: Chocolate Chip
Accessories: Cogs Punch, Big Shot, Top Note Die, 2-1/2" Circle Punch, Naturally Serif Alphabet Die, Early Espresso 1/8" Taffeta Ribbon, Hemp Twine


Photobucket

Tuesday, July 05, 2011

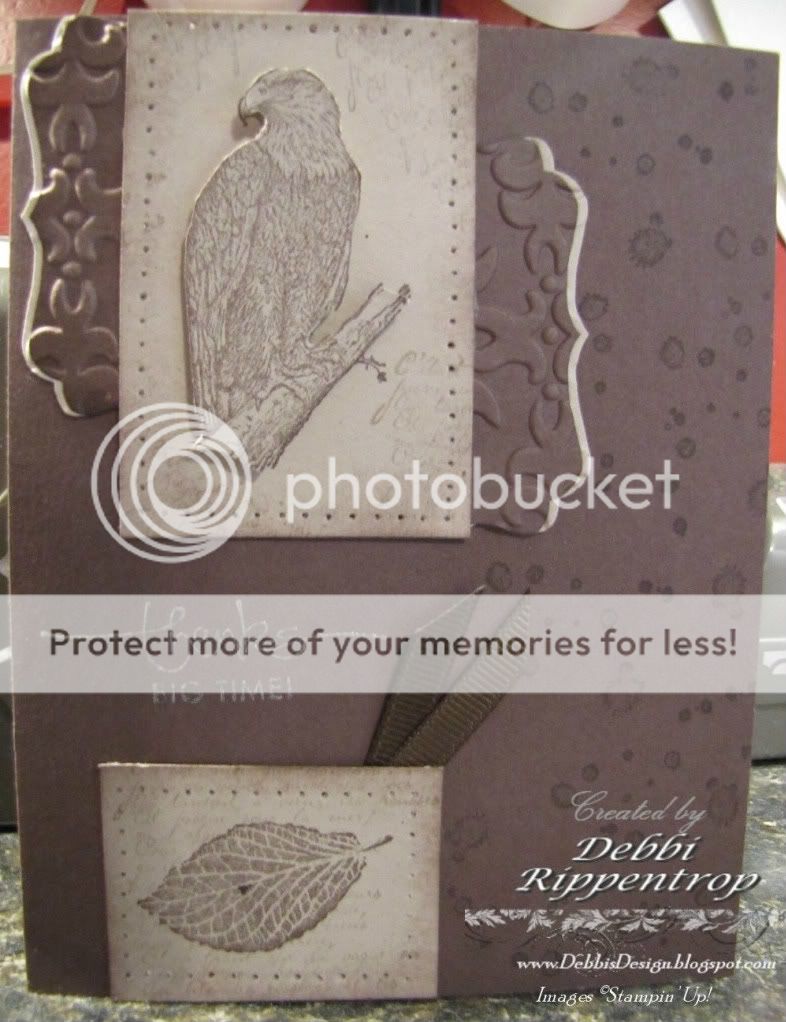
Eagle Sketch


I have been able to make at least one card a week but then I do not have time to post them.  I just looked and I have close to 10 drafts set up with images and need to take a day to sit down and add the details.  Let's see what I can get done today. Maybe I won't seem like such a bad blogger.  I have been super busy with weddings and baby name frames. Hopefully I got good enough pictures and will get them up in the next few weeks.
I Love this eagle and just feel like he need to be cut out and popped up to give him dimension.

Card Details:
Stamps:  In Wilderness, French Foliage, A Word for You
Paper: Chocolate Chip, Crumb Cake
Ink: Chocolate Chip, Very Vanilla Craft
Accessories: Big Shot, Clear Embossing Powder on Sentiment, Decorative Label Punch, Vintage Wallpaper Embossing Folder, Piercing Tool, Chocolate Chip 1/4" Grosgrain Ribbon


Photobucket

Wednesday, June 22, 2011

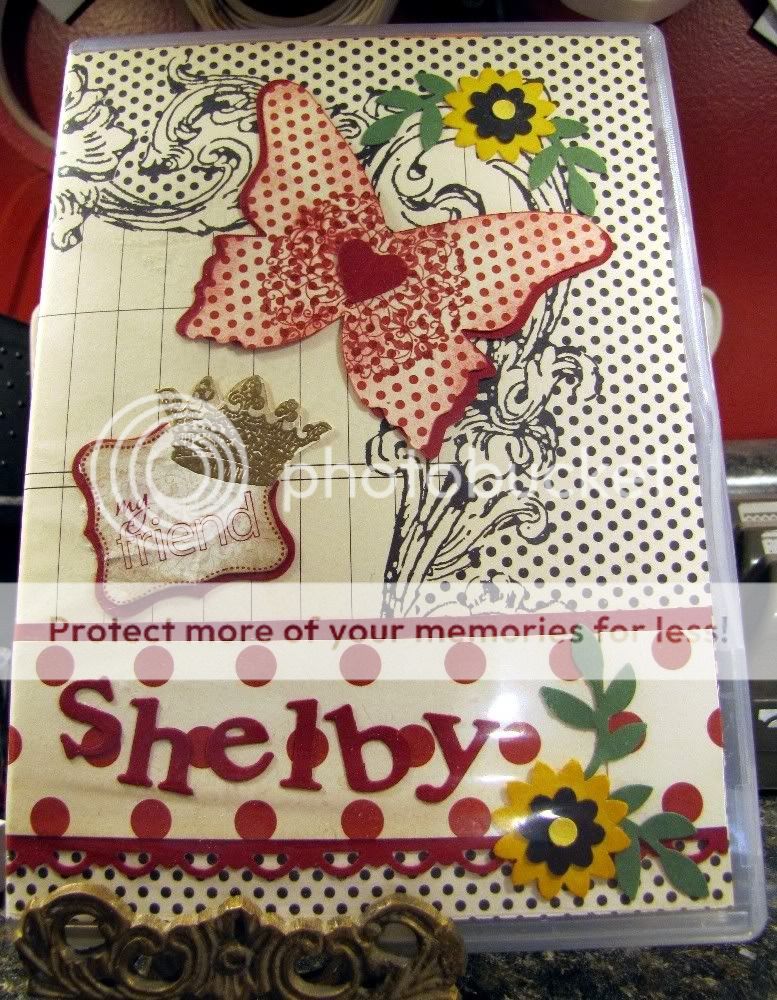
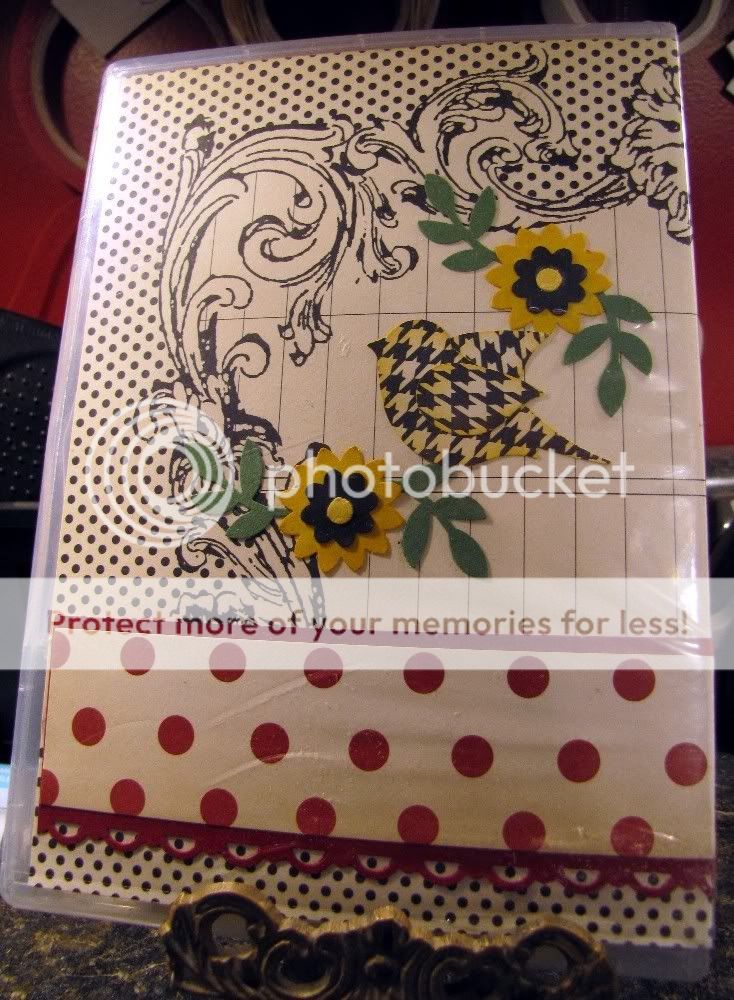
Altered CD Case

My daughter wanted so badly for her friends to have these as a thank you gift for coming to her 9th birthday party.  I had ordered some of the Clear Mount Stamp Cases (4 for $4.95).  We measured the lining, scored the folds and started decorating.

She loves to sponge edges as much as I do so she had very pretty finger tips when she was done.  To do the Crown we stamped and embossed first.  We then masked the crown with another crown that I had stamped and cut out on a piece of scratch paper.  So when we stamped the "My Friend" it looked like it was behind the crown.  The butterfly was sprayed with the shimmer paint/rubbing alcohol mixture to give it just a bit of glimmer.


The inside we decided to put a post-it note pad, pen held on with a cable clip and a pack of gum stuck on with glue dots, all she thought we needed to add was a stick of lip balm...but we do not have any stores within a 30 min drive so she got what I had on hand. ;-)  (Her friends loved them anyway!)
Card Details:
Stamps:  Artistic Etchings, Perfect Punches
Paper: Love Letter DSP, Cherry Cobbler, Daffodil Delight, Garden Green, Basic Black
Ink: Versa mark, Cherry Cobbler Sponging- Cherry Cobbler, Crumb Cake, Daffodil Delight,
Accessories: Big Shot, Beautiful Butterflies Die, Designer Label Punch,  2 Step Bird Punch, Itty Bitty Shapes Punch Pack, Naturally Serif Alphabet Die, Boho Blossoms Punch, Crop-a-dile:Flower Center, Small Heart Punch, Scallop Trim Border Punch

Photobucket

Sunday, June 12, 2011

Congratulation Graduate


So I am hooked on the Tri-Shutter Cards that I just had to make another one.  I thought how fun would it be to do a graduation one.  To see the tutorial on Splitcoast click here.  The tassel is just very finely cut paper with the end left intact and placed under a brad.  The C is on Dimensionals to pop it up.  The diploma is just Very Vanilla Card stock rolled up, tied and curled up the edges and held on with glue dots.  Off to make some more!

Card Details:
Stamps: Go Graduate
Paper: Love Letter DSP, Basic Black, Very Vanilla, Certainly Celery
Ink: Basic Grey
Accessories: Big Shot, Serif Essentials Alphabet Die, Star Punch, Naturally Serif Alphabet Die, Square Lattice Embossing Folder, Spiral Border Punch, Mini Library Clip, Twine, Itty Bitty Shape Punch, Metallic Brad


Photobucket

Friday, June 10, 2011

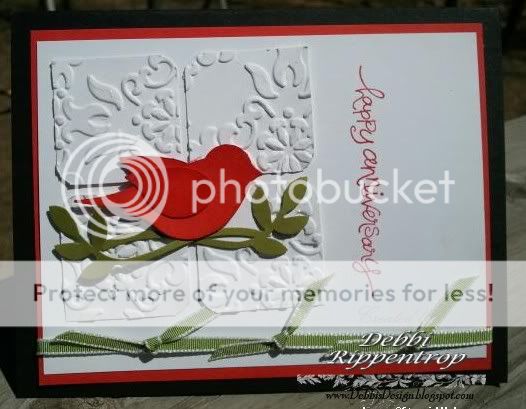
Happy Anniversary

I needed a simple anniversary card quick.  I found this layout and thought it would be perfect for what I was looking for.  You could anything you wanted on the 4 panels to go with any card.  I thought a cute punch art wedding cake would be cute too....someday I might remember to actually make that one.


I have been trying to do more on the insides of the cards and so this is what I came up with that still gave me room to sign all of our names. ;-)
Card Details:
Stamps: A Word for You
Paper: Basic Black, Riding Hood Red, Whisper White, Old Olive
Ink: Riding Hood Red
Accessories: Small Heart Punch, Scallop Trim Border Punch, 2 Step Bird Punch, Old Olive Taffeta Ribbon, Corner Rounder Punch, Big Shot, Vintage Wallpaper Impression Embossing Folder


Photobucket

Thursday, June 02, 2011

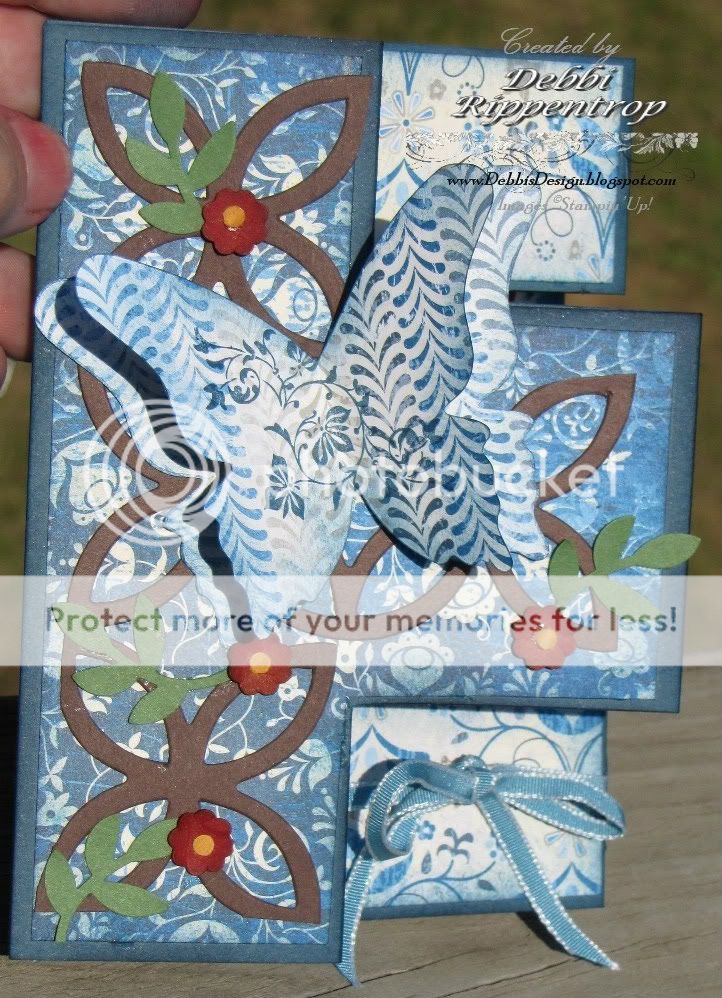
Happy Anniversary Heath & Lois!

I have had this card on my list of things to do for a very long time.  Our eldest son and his wonderful wife celebrate their 5th anniversary today and I could not think of a better card for them.  For those who want a tutorial, it can be found on Splitcoast.  It was not as hard to make as I thought it would be.  The designing is what took me so long (about 3 hours) but now that I know what I am doing they should go a lot faster next time.


I sponged all of the edges...;-)

The flowers were punched, sponged and edges curled.  They were adhered with glue dots to the card.  I used the small side of  crop-a-dile to get the center of the flower and adhered it with the Mono-adhesive and a toothpick to put it just where I wanted it.  The Amour is popped up on Dimensionals.


I slit the edges of the center, bottom panel with my craft knife and slid the ribbon around to tie.  I made sure it stayed where I wanted it to be with a few glue dots.


The butterfly is cut out twice.  The bottom one is glued flat while the top one is folded with some more glue dots ran down the center


The Happy Anniversary just barely fit...I am so glad that it did!  The bottom panel was left blank so that we could sign the card.

Card Details:
Stamps: Vintage Vogue, Artistic Etchings, Thanks for Caring
Paper: Not Quite Navy, Cherry Cobbler, More Mustard, Very Vanilla, Garden Green, Chocolate Chip, Blueberry Crisp DSP
Ink: Not Quite Navy, Cherry Cobbler
Accessories: Big Shot, Beautiful Butterflies Die, Designer Label Punch, Crop-a-dile, 2 Step Bird Punch, Marina Mist Taffeta Ribbon, Lattice Die, Itty Bitty Shapes Punch Pack, Naturally Serif Alphabet Die


Photobucket

Wednesday, May 18, 2011

Mom-in-law Day


My mother-in-law is a country girl with love of flowers and butterflies so that was the look I was going for here.  I sponged and curled a bunch of edges.  To get the flower centers I used the large side of the crop-a-dile to get a small circle. I noticed I have been using retired sets lately.  I really need to clean out my setsa nd get them straightened out.  Free time is what I am lacking and if I do find some spare time cleaning is the last thing on my mind...I want to stamp!  If you are looking for any retired SU products please check out my retired store above ad see if I have something you might be looking for!

Card Details:
Stamps: Punched Posies, Well Scripted
Paper: Daffodil Delight, Early Espresso, Old Olive, Whisper White
Ink: Daffodil Delight, Early Espresso
Accessories: Big Shot, Finial Press Impression Folder, Beautiful Wings Die, Designer Label Punch, Crop-a-dile, 2 Step Bird Punch, Scallop Circle Punch, Boho Blossoms Punch, early Espresso Taffeta Ribbon,
Photobucket

Monday, May 16, 2011

Happy Mother's Day


Wow, my weeks have been busy and to top it off I found out last week that I have pneumonia!  I had this project scheduled to post last week.  I finally figured out that I never saw it come through my e-mails and when I went to see why it had not posted I found that not only had it not saved any of my information, it had done the same to all 3 of the projects I had ready to go.  All was gone except for the image....not fun!

So this was the card that went to my beautiful mother for Mother's Day.  The flower was stamped with versa mark and embossed with Whisper White embossing powder.  I then used the re-inker and Aqua Pen to color it in.  I find it is easier to color before I cut it out...that way I do not have to stay in the lines. I kept it pretty simple so that it would make it through the mail and actually arrive on time.

Card Details:
Stamps: Fifth Avenue Floral, Well Scripted
Paper: Regal Rose, Old Olive, Daffodil Delight, Whisper White
Ink: VersaMark, Regal Rose
Accessories: Big Shot, Tulip Impression Folder, Beautiful Wings Die, Decorative Label Punch, Leaves-2 step bird Punch, Whisper White Embossing powder


Photobucket

Monday, April 04, 2011

Beary Balloons Birthday

My daughter wanted a cute girly card to go with her gift for her birthday party last week so this is what I came up with.  The girl's mother told me that her daughter loves purple.  The bear and balloons are popped up with dimensionals and the banner and butterfly was curled and adhered with Mono adhesive.  I wanted the background to look sky like so I tore a sheet of paper and did a bunch of edge sponging.
Card Details:
Stamps: Teeny Tiny Wishes, Vintage Vogue
Paper: Concord Crush, Sahara Sand, Daffodil Delight, Pear Pizazz, Peach Parfait, Poppy Parade, Chocolate Chip, Basic Black, Riding Hood Red
Ink: Concord Crush, Sponging-Sahara Sand, Daffodil Delight, Pear Pizazz, Peach Parfait, Poppy Parade, Chocolate Chip
Accessories: Big Shot, Circle Punch, Perfect Polka Dots Impression Folder, Beautiful Wings Die, Top Note Die, Build a Bear Die, Build a Bear Essentials Die,  Pearls, Concord Crush Stitched Poly Ribbon, Filigree Designer Brads

Photobucket

Friday, April 01, 2011

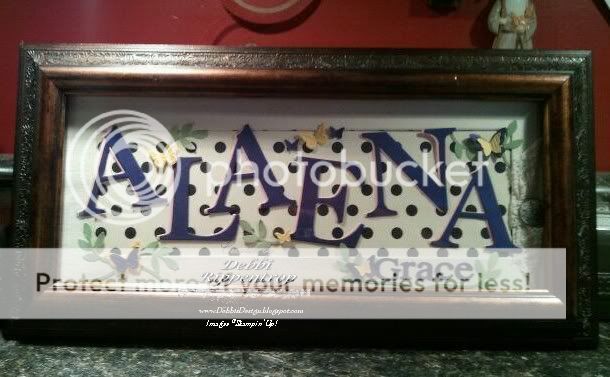
Alaena Plaque

My daughter needed a gift for a friend and after the last baby frame that I did she requested I make one for her friend since her name is spelled uniquely and personalized things would be hard to find.  

Card Details:
Stamps: None
Paper: Vanilla, Love Letter DSP, Blushing Bride, Concord Crush, Pear Pizazz, Daffodil Delight
Ink: None
Accessories: Big Shot,  Serif Essentials Alphabet (large), Naturally Serif Alphabet Die (small), Beautiful Wings Die, Tow Step Bird Punch, Victoria Crochet Trim Ribbon, Antique Brad

Photobucket

Wednesday, March 30, 2011

Sympathy Butterfly


Hubby called again today and needed a sympathy card for someone at work.  It once again had to be a full size card for many signatures.  So this card is 8.5" x 5.5".  It went together very simple and quick.  This Love Letter Designer paper is becoming my "go to" paper and I will have to stock up if it is dis-continued at the end of the catalog.  The butterfly was sponged with Very Vanilla Craft ink to soften the edges just a bit.  The Sympathy is pop up with many dimensionals and the butterfly is stuck on with Mono Adhesive.


Card Details:
Stamps: Thanks for Caring
Paper: Naturals Ivory, Basic Black, Love Letter DSP, Riding Hood Red
Ink: Early Espresso, Sponging-Sahara Sand, Very Vanilla Craft
Accessories: Big Shot, 2 1/2" Circle Punch, Scallop Circle Die #2, Pearls, Beautiful Wings Die, Scallop trim Border Punch, Victoria Crochet Ribbon

Photobucket

Monday, March 28, 2011

Spinner Happy Birthday

I really needed a manly happy Birthday card for my Father-in-Law last week.  I did not have a clue where to start.  Before I ran my kids to band I set out all of the colors I wanted to use and in the order I wanted them placed.  I took a picture of the pile with my cell phone and took it with me.  twice a week I sit for 2 hours while my boys take turn having band lessons.  The downfall of not living in town where they could walk.  So I studied the picture and the layout from the sketch challenge while I was waiting.  So after I got home and fed the kids lunch I was ready to make it all fall in place. I loved the spinner cards and just had to have them but the right opportunity just did not come up until now.  I did not have any black brads so I had to make them but heating the up with the heat gun, dipping them in the black embossing powder and heating again if needed.  I love that sponging ink around the edges of the Love Letter paper does so much but yet so little.  I had it all lined up straight and was ready to adhere and I decided to shift it all just a bit.  I am glad that I did.

Card Details:
Stamps: Take a Spin, Sanded Background
Paper: Cajun Craze, Old Olive, Basic Black, Very Vanilla, Love Letter DSP
Ink: Cajun Craze, Old Olive
Accessories: Big Shot, Circle Punch, Old Olive Brads, Black Embossing Powder, Corner Rounder, Lattice Impression Folder 

Photobucket

Friday, March 25, 2011

Baby Boy Name Plaque


I had to get together a baby shower gift so this weeks posts will contain the card, bag and gift that I made this last weekend. I wanted them all to co-ordinate so I tried to keep the circle theme and colors through out.

 I found the easiest way to make the circles is to punch the small one first and work my way out. Since for the 3 projects I was working on I started with the 3/8" circle punch and worked my way out to the 1-3/4" circle punch.  That way I had various sizes to work with and used as little card stock as possible.


Card Details:
Stamps: None
Paper: Marina Mist, Not Quite Navy, Blueberry Crisp Designer Paper
Ink: None
Accessories: Big Shot, Circle Punches,  Serif Essentials Alphabet (large), Naturally Serif Alphabet Die (small),, 1/8" Marina Mist Taffeta Ribbon, Frame


Photobucket

Wednesday, March 23, 2011

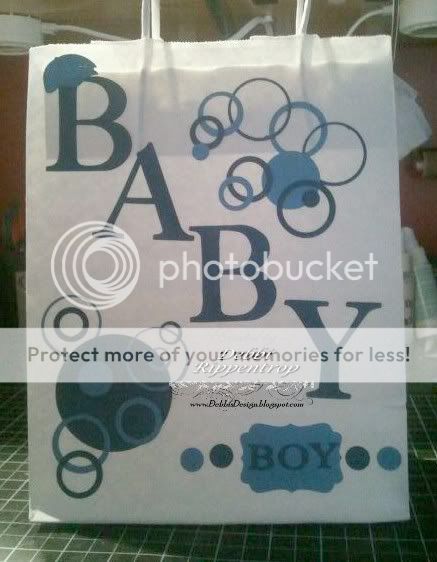
Baby Boy Bag

I had to get together a baby shower gift so this weeks posts will contain the card, bag and gift that I made this last weekend. I wanted them all to co-ordinate so I tried to keep the circle theme and colors through out.

 I found the easiest way to make the circles is to punch the small one first and work my way out. Since for the 3 projects I was working on I started with the 3/8" circle punch and worked my way out to the 1-3/4" circle punch.  That way I had various sizes to work with and used as little card stock as possible.

This is just a plain white gift bag.  I stocked up on them when SU discontinued them a few years ago.  I added the circles as I had explained above and glued them all on with the Mono Adhesive glue.


Card Details:
Stamps: None
Paper: Marina Mist, Not Quite Navy, 
Ink: None
Accessories: Big Shot, Circle Punches, Decorative Label Punch, Serif Essentials Alphabet (large), Naturally Serif Alphabet Die (small), Cap-Beary Boy Die 

Photobucket

Monday, March 21, 2011

Baby Boy Card

I had to get together a baby shower gift so this weeks posts will contain the card, bag and gift that I made this last weekend.  I wanted them all to co-ordinate so I tried to keep the circle theme and colors through out.

I have always thought the punch art sail boats are so cute and so simple. I used Dimensionals to pop up the pieces of the sailboat. So I decided to use that as my focus on the card.  I found the easiest way to make the circles is to punch the small one first and work my way out. Since for the 3 projects I was working on I started with the 3/8" circle punch and worked my way out to the 1-3/4" circle punch.  That way I had various sizes to work with and used as little card stock as possible.


Card Details:
Stamps: None
Paper: Marina Mist, Not Quite Navy, Whisper White Blueberry Crisp Designer Paper 
Ink: None
Accessories: Big Shot, Perfect Polka Dots Embossing Folder, Square Lattice Embossing Folder, Framed Tulips Embossing Folder, 1/8" Marina Mist Taffeta Ribbon, Naturally Serif Alphabet Die, Star-Beary Boy Die, Circle Punches, Rhinestone


Photobucket

Friday, March 04, 2011

Flourish Mushroom

This is a card made up of a couple of trial and mistakes.  The mushrooms had been sitting on my shelf since before Christmas and one day I accidentally set the flourish stamp on it wet.  Well I liked the way the accident looked so I kept it...sitting on my shelf  The backing was from when I was playing around with the tulip Impression Folder to see how to resize it.  That too had been set aside for a future use.  So I had some friends over the other night to make cards and I was digging through my scraps to see what I wanted to work on and these just fell together perfectly. 

Card Details:
Stamps: Teeny Tiny Wishes, Tiny Tags, Funky Four
Paper: Sahara Sand, Not Quite Navy, Soft Suede, Very Vanilla
Ink: Sahara Sand, Not Quite Navy, Soft Suede
Accessories: Framed Tulips Impressions Folder, Big Shot,Decorative Label Punch,pearls, Antique Brads


Photobucket

Tuesday, March 01, 2011

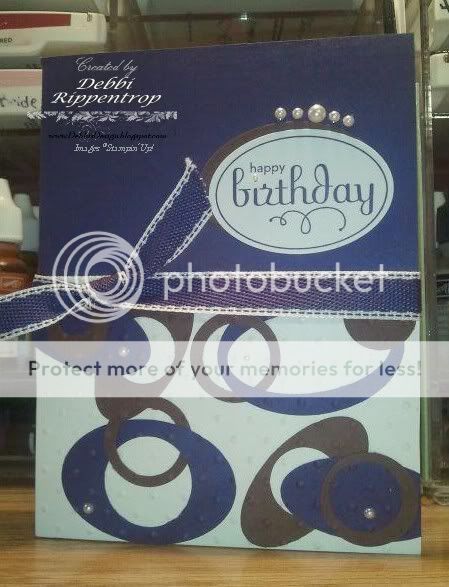
Oval Birthday

Once again I saw this concept on another blog but I did not bookmark it so I cannot point you back to it.  If it is yours or if you know where it came from please let me know so that I may edit and give proper credit.  I do believe the original card is pink and brown.  I punched out various ovals and circles and adhered them to the card.  I then ran the whole base through the Big Shot with the Perfect Polka Dots Folder.

Card Details:
Stamps: Perfect Punches
Paper: Concord Crush, Chocolate Chip, Whisper White
Ink: Concord Crush
Accessories: Big Shot, Perfect Polka Dots Impressions Folder, Wide Oval Punch, Small Oval Punch, 3/4" Circle Punch, 1" Circle Punch, Mini Circle Punch, Pearls, Concord Crush Stitched Poly Ribbon


Photobucket
Related Posts with Thumbnails