Monday, November 30, 2009

MDS Monday Double Drop Shading

Non-MDS related but boy do I love the Snipping tool feature on Windows 7. It sure makes the screen capture option old news. On to MDS.

So today I am going to show you how I make the Drop Shadow feature do double duty. I know when I make a card and put it up on dimensionals or Pop up glue dots, it is up there and seems to be all the way around so that is what I was striving for here.


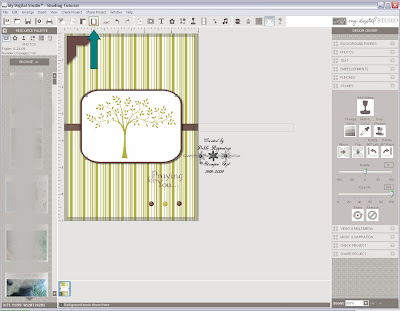
Here is the card I am starting out with.


Now I have clicked on the punch behind the image and went to the Drop Shadow button.


This little box will pop up with all of your options. You can adjust how heavy you want the shadow and how deep you want it. You can even change the color of the shadow, for this card I will be leaving it black.


As you can tell the shadow is on the right and the bottom of the punch.


With my punch still clicked I am going to go up to the toolbar and first click the double paper which will copy what I have clicked. Next I will go to the straight clip board which will paste the image I just copied exactly on top.


As you can see my pasted copy is on top but the shadow is still all on the left and on the bottom. So I will need to take care of that.


I have opened the drop Shadow box of the new pasted punch. Can you see that where the arrow is pointing is telling me the offset of both the punches. I am going to need to change that to the complete opposite.


You can either grab the shadow and drag and drop it. Since I am going for a specific number and not just what looks good I am going to use my arrow keys to change it. So I just went for 5/5 to -5/-5. As you can see the shadow for the new punch is on the top and on the right,


Here is the punch with a shadow all the way around, but I think I would like the image on the top...


Back to the toolbar to find the Change Object Layer Button. I am going to choose the Send to Back option.


So now I have my card finished with 2 punches exactly on top/bottom and the shadow all the way around the element. I think this makes it look like it is standing right off of the card.


I hope this has given you something new to try on your MDS. Let's see what I can come up with next week! If you have any requests please post them here!


Signature

Friday, November 27, 2009

Joy


Here is the second side of the blocks I have been working on. The thing that brings the most joy in my life is Jesus. So I thought it fitting for this image to be included to finish of this side. The backing of the J was ran through an embossing folder and then I sponged some Very Vanilla Craft ink over the tops of the poinsettias. The manger scene is embossed and the star is on half of a dimensional. I sponged around the edges of the flowers. I actually had a green thumb, and the only way I could get one... The berries on the holly were punched out by the crop-a-dile (gotta use what I've got :) )

Stamps:Season of Simple Grace
Paper: Merry Moments DSP, Real Red, Garden Green, Chocolate Chip, Very Vanilla, Summer Sun
Ink: Summer Sun, Chocolate Chip Craft, Garden Green
Accessories: Clear Embossing Powder, Big Shot, Serif Essentials Alphabet Die, Chocolate Chip Taffeta Ribbon, Sleigh Bells Ribbon, Merry Details Die, 5/16" Chocolate Chip Brad, Eyelet Border Punch, Boho Blossom Punch, 3/4" Circle Punch, 1" Circle Punch, Petals-a-Plenty Embossing Folder


Have a GREAT weekend!!
Signature

Wednesday, November 25, 2009

Snow


I have been busy working on some Christmas orders so not too many cards have been made. I have to make 15 of these so not much else to post for awhile. I will post each side on different days, so keep watching! I just love these fun blocks. I asked my Dad if he could cut me some 3.5" x 3.5" blocks for a craft project (DH is overloaded right now). Dad went above and beyond. He cut them, sanded, and round all of the corners. I had intended to paint them but they were just too nice so I stained them instead and I am so glad that I did.

The SNOW is sprayed with the Shimmer Paint mixed with Rubbing Alcohol. It adds just a slight sparkle. I could spray everything with this!

Stamps: None
Paper: Merry Moments DSP, Real Red, Old Olive, Garden Green Chocolate Chip, Very Vanilla
Ink:None
Accessories: Jumbo Grommet, Big Shot, Serif Essentials Alphabet Die, Chocolate Chip Taffeta Ribbon, Sleigh Bells Ribbon, Merry Details Die, 5/16" Chocolate Chip Brad, Scallop Edge Punch

Signature

Monday, November 23, 2009

MDS Monday Offset Stamping

One of the things I love to do in MDS is offset stamping. So for those of you not familiar with this I am going to step you through it. Remember the pictures can be clicked on and will open in a new window to view larger.


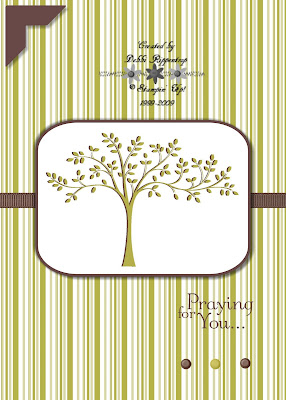
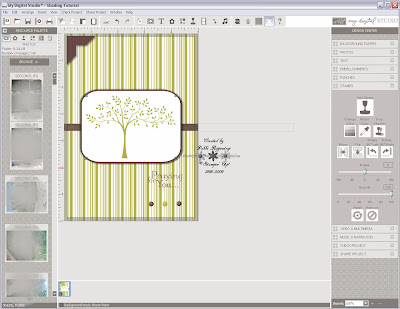
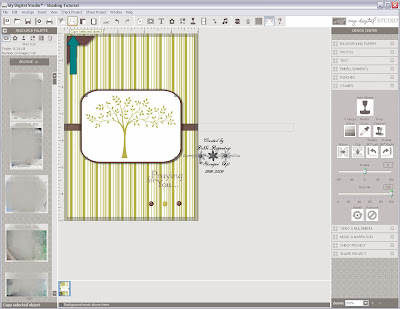
First I have created the card just how I want it. I have added the background and the embellishments that I want. I have also added the stamped image that I want and put it in one of the colors that I intend to use.


The next thing I need to do is click on the image that I want to offset. Next I am going to go to the top and click the 2nd image in the 2nd box. It is the copy button and will copy what I have chosen.

Then I am going to move over 2 buttons and choose to paste the image exactly right on top of the image I have just copied. So I will have 2 of the same exact items in the same exact place.


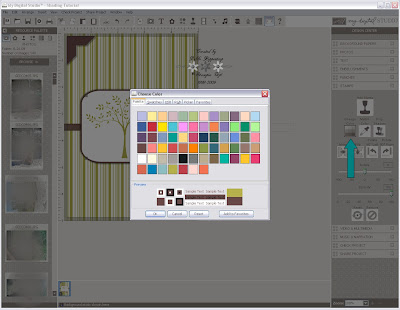
The next thing I need to do is change my top item to a new color. There is no need to click on the item because when you paste it, it will automatically switch to the new item. So I will click on my change color options and this item I want to make Chocolate Chip to go with my embellishments. At this point I changed the pasted item to the color that I am going to want on the bottom.


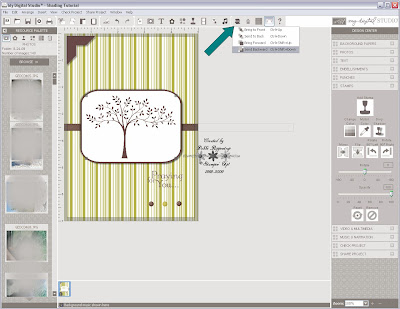
Now you cannot see but I have 2 stamped trees. The bottom one is Kiwi Kiss and the top one is Chocolate Chip. It is easier to change the pasted one to be the color you want on the bottom because once it is on the bottom it is impossible to grab it again to move it. Now I am going to click on the Layering button and choose Send Backward. How many times you click it will depend on how many items you put on the page between your two stamped images. So if you stamped you first tree and then added the 3 brads and the ribbon you are going to have to move the new pasted tree back 5 times in order for it to be behind the tree. Once you get the pasted image behind the other image, do not click anywhere (or you will have to move you top image backwards to be able to get a hold of your bottom image again) Now just use your arrow keys left, right, up or down to do you offsetting.


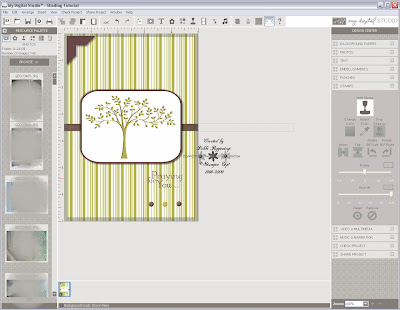
Once you get the offset degree that you want you are all set. This is one of the perks in digital that you cannot do in real paper/ink card making. If I were to offset the Kiwi Kiss over top of the Chocolate Chip on a regular card the Chocolate Chip would show through. Here it just gives a nice shadow effect.


I hope this has given you something new to try on your MDS. Let's see what I can come up with next week! If you have any requests please post them here!
Signature

Friday, November 20, 2009

Suede Christmas


For this card I used a few elements that I have seen in different cards and combine them here. I appreciate all of the different Stampin' Up! blogs out there right now that we can gather so many great ideas from. This is one of the cards that we will be doing at our Ladies night out in a couple of weeks. I struggle with the use of the Jumbo Grommets even though I think they are a great embellishment. I think this is a great way to use them. I have started keeping a spritz bottle of Rubbing Alcohol on my shelf. It works great to spray the texture plates with to give them just a little more depth. Don't faint but this card has NO sponging on it....
Stamps: Season of Simple Grace, Teeny Tiny Wishes
Paper: Soft Suede, Real Red, Whisper White, Christmas Cocoa Specialty DSP
Ink: Soft Suede, Real Red
Accessories: Jumbo Grommet, Big Shot, Scallop Circle Die, Modern Label Punch, Modern Label Die, Texture Plate, Whisper White Organza Ribbon

Have a GREAT weekend!!
Signature

Monday, November 16, 2009

MDS Monday Picture Punches

I have read questions on how to round the corners of your pictures. This will work for pictures to be used with any of the punches. This will take more than work in MDS and I do not know how much the reader is familiar with this type of work so I am going to try to do as many steps as possible.


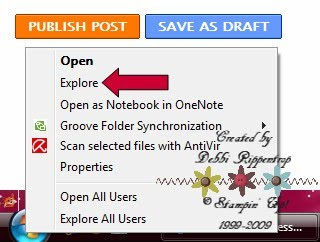
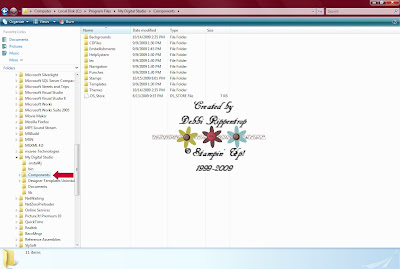
I am working in Windows Vista and I know it will work the same in XP. My copy of Windows 7 has not yet arrived so I am not sure on that. To start you will need to take your mouse and hover over your start button in the lower right corner of your desktop and right click on it, choose Explore.


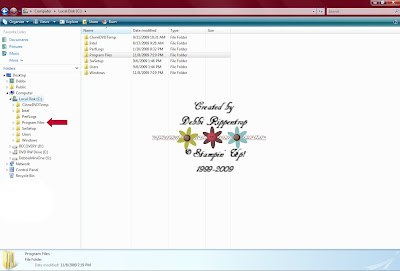
It will take you to a section on your computer where you can view the contents of your hardrive(s). Under your C: Drive you are looking for a folder named "Program Files" Click on the arrow next to that.


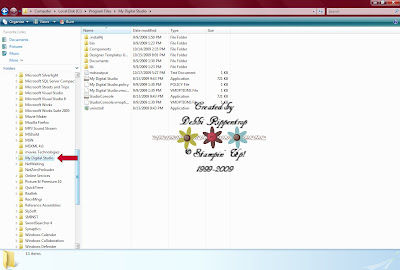
It will open up all of your program files. They are in alphabetical order and you are now looing for one named "My Digital Studio". Once again, click on that arrow.


Under My Digital Studio is a file named "Components"....arrow.


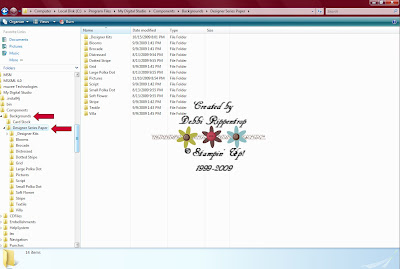
Backgrounds...arrow will give you a view to Designer Series Paper. Here is where our work begins.


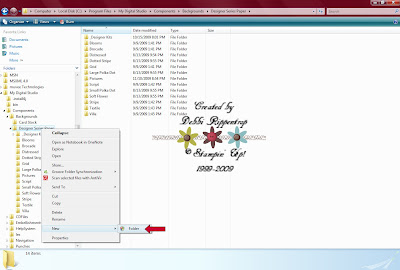
If you are working with Vista you can right click on the Designer Series Paper Folder and your options will appear New and choose folder. If you are working with XP you will have to click on the Designer Series Paper folder, go to the upper left hand corner/ File/ New /Folder. You will now have the option to name your Folder. I named mine Pictures.


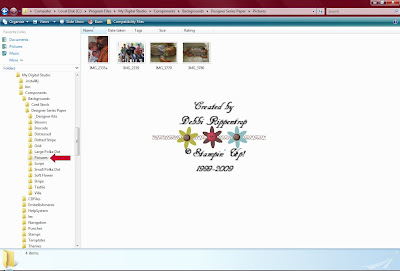
So now that I have a new folder in the correct area I can put the pictures I want to work with. I just went to my picture folder, clicked on the images I wanted ctrl +c (copy). I then went back to the new folder I created in MDS and ctrl +v (pasted) the pictures. I, personally did not want to move them there because it will be easier to just delete them from my MDS folder when I have finished with them then to move them back to where I store my pictures.

The hard part is over, now onto the fun!

Some programs will not let you alter folders and still be effective until you re-start the program. I created the folder and moved the pictures in while I had MDS open and they showed up immediately.


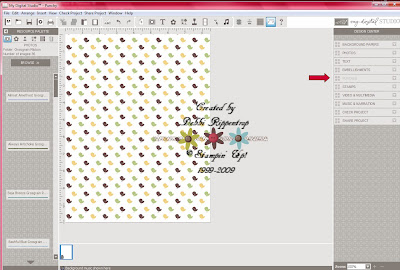
I started an 8.5 x 11" blank page and have already put in a background that I plan on using. Next I am headed to the punches.


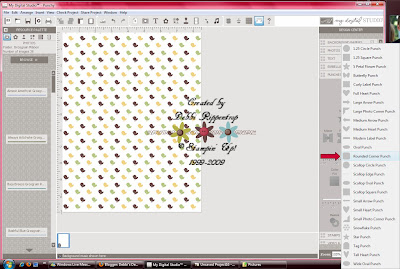
I am going to choose the Rounded Corner Punch but like I said when I started this will work with any of the punches.


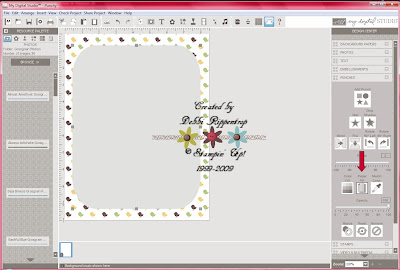
Here I have stretched the punch to the size that I want it to be on the page. This really can be done at any time but I know I want this picture to take up most of the page so I did it right away. Then I am going to click the Paper Fill option.


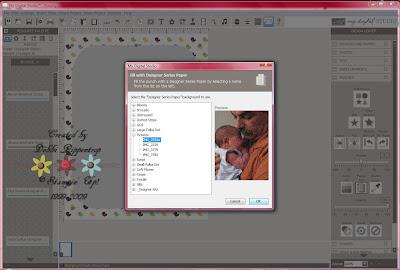
Here I will find the picture folder I have created right along with all of the Designer Series Paper folders. So I am going to click on the images until I find the one that I plan on using. I am going to use one of my husband and our wonderful grand-daughter right after she was born.


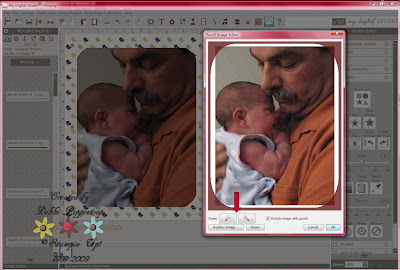
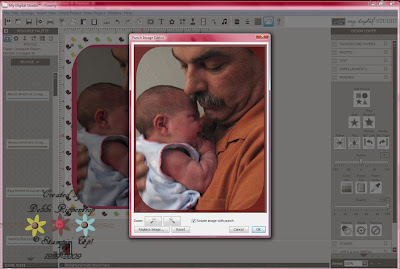
After you hit Ok your image will appear on your page. It more than likely will not turn out just as you want it the first click. You will need to double click on your picture to get the edit window to pop up. You can see that my picture is actually too small (white sides) for how it was originally set. If I left it that way and I wanted to add a matting, as I do, it would fill in the white sides before it started the matting. Guess how I found that out.... So I am going to adjust the picture larger or smaller with the Zoom buttons.


So now you can see that I made the picture to fit the punch. You can also click and drag the picture around to get it to fit just like you want it to. Off to embellish the rest of the page!


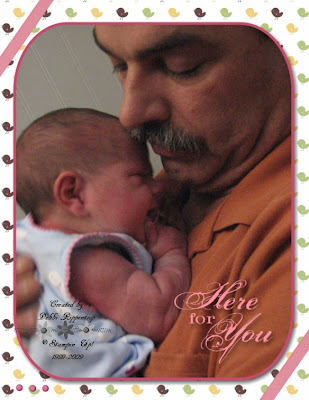
Can you tell she had Grandpa wrapped around her finger even before she was born?

I hope this has given you something new to try on your MDS. Let's see what I can come up with next week! If you have any requests please post them here!
Signature

Friday, November 13, 2009

Photography Thank You


I asked a gentleman I know if he could come in to our Home-School classes (we meet once a month for special group classes) and talk to our teens about photography. I was hoping I would learn something too :). So then I got the opportunity to make a Thank You card for him from the group and here is what I came up with. I was debating between anything with the filmstrip and the punch cameras so I decided to merge them both and put the punch camera in the filmstrip. I needed to add the stars so it looks like the flashes were going off. I sponged around the whole front of the card and around each of the white boxes on the filmstrip. I used the crop-a-dile to punch the hole in the center of the smaller circle. This was a fun card to make and I know he will enjoy it!
Stamps: Medallion Background, Teeny Tiny Wishes, Define Your Life,
Paper: Basic Gray, Basic Black, Whisper White, Crushed Curry
Ink: Basic Gray,
Accessories: Punches- Spiral, Large Oval, Small Oval, Designer Label, 1" Circle, 3/4" Circle, Crop-a-Dial, Horizontal Slot, My Way, Small Star

Signature

Wednesday, November 11, 2009

With Sympathy


My husband called me from work last week and requested I put together a sympathy card for him to give one of his fellow employees who lost his father suddenly this weekend. So this is what I came up with on the spur of the moment. I started out with just black and gray card but thought it seemed too dismal so I added a touch of pink to brighten it up a bit. I am never too good with sympathy cards...The flower was stamped in the Basic Gray Ink Pad and outlined on the stamp with the Basic Black marker. Of course I just had to sponge around the edge. The sentiment was first stamped in Going Gray and then I used the Stamp-a-ma-jig to offset and stamp in Pretty in Pink. The ribbon was looped around the card front and fastened with Mini Glue Dots. I then put a Basic Gray an Pretty in Pink Taffeta Ribbons together and tied them on. I ran the designer paper through the Big Shot in an embossing folder.
Stamps: Inspired by Nature, Teeny Tiny Wishes
Paper: Basic Gray, Basic Black, Whisper White, Night & Day Specialty Paper, Pretty in Pink
Ink: Basic Gray, Basic Black,Pretty in Pink, Going Gray
Accessories: Big Shot, Elegant Bouquet Impression Embossing Folder, Magnetic Movers and Shapers Modern Label Die, Modern Label Punch, Word Window Punch, Pretty in Pink Taffeta Ribbon, Basic Gray Taffeta Ribbon

Signature

Sunday, November 08, 2009

Blog Candy Winners

Being that I had a special few comment for my first Blog Candy I decided that each of you are winners! It is a special day, as it is my son's 24th and would be my late sister's 30th birthday today. So I have created a few different blogs. Karen, Kim, Jana & Anne...you can pick one of the following blogs. Let me know the name of your blog and if you want different colors, stamps etc. Images can be clicked on to enlarge for a better view.

You can either contact me through my contact e-mail above or by a PM to Motherof6 on SCS.


Signature
Related Posts with Thumbnails